A strong photo background is rarely an afterthought; it is the stage that tells the viewer how to read the subject. Even when the main focus is a person, a product, or a landscape, the backdrop quietly controls mood, context, and clarity. A clean studio backdrop can make a portrait feel timeless and professional, while a textured wall can introduce grit and authenticity. The same subject photographed against a bright window, a dark curtain, or a busy street will communicate different emotions and different levels of polish. This happens because the human eye searches for patterns and contrasts first, then decides where to rest. The background is where those patterns and contrasts either support your subject or compete against it. When the photo background is thoughtfully chosen, the subject stands out without looking cut out or artificially separated. When it is ignored, the viewer’s attention scatters, and the image feels confusing even if the camera settings are technically correct.
Table of Contents
- My Personal Experience
- Why a Photo Background Shapes the Entire Image
- Types of Photo Backgrounds: From Seamless Paper to Real Locations
- How Color Choice in a Photo Background Controls Mood and Branding
- Texture, Pattern, and Depth: Making the Background Interesting Without Distracting
- Lighting Strategies That Transform Any Photo Background
- Composition Tricks: Using the Background to Lead the Eye
- Photo Background for Portraits: Clean, Flattering, and Consistent
- Photo Background for Product Photography: E-commerce and Advertising Needs
- Expert Insight
- DIY and Budget-Friendly Background Ideas That Still Look Professional
- Editing and Background Replacement: Keeping Results Natural
- Common Mistakes That Make a Photo Background Look Cheap
- Choosing the Right Background for Social Media, Websites, and Print
- Building a Repeatable Workflow for Better Photo Background Results
- Final Thoughts: Making the Photo Background Work for You Every Time
- Watch the demonstration video
- Frequently Asked Questions
- Trusted External Sources
My Personal Experience
I didn’t realize how much a photo background mattered until I tried taking headshots for my LinkedIn profile at home. I stood in front of a white wall, but the light from the window cast a weird shadow behind my head, and a cluttered bookshelf kept sneaking into the edge of the frame. After a few frustrating tries, I moved a small table and taped up a plain bedsheet as a backdrop, then angled myself so the light hit my face instead of the wall. The difference was immediate—everything looked cleaner and more professional, and I stopped worrying about what was happening behind me. Now, whenever I take a picture, I check the background first before I even think about posing.
Why a Photo Background Shapes the Entire Image
A strong photo background is rarely an afterthought; it is the stage that tells the viewer how to read the subject. Even when the main focus is a person, a product, or a landscape, the backdrop quietly controls mood, context, and clarity. A clean studio backdrop can make a portrait feel timeless and professional, while a textured wall can introduce grit and authenticity. The same subject photographed against a bright window, a dark curtain, or a busy street will communicate different emotions and different levels of polish. This happens because the human eye searches for patterns and contrasts first, then decides where to rest. The background is where those patterns and contrasts either support your subject or compete against it. When the photo background is thoughtfully chosen, the subject stands out without looking cut out or artificially separated. When it is ignored, the viewer’s attention scatters, and the image feels confusing even if the camera settings are technically correct.

Beyond aesthetics, a photo background influences exposure, color rendering, and even perceived sharpness. A pale backdrop can trick a camera’s meter into underexposing, while a dark backdrop can push the meter to brighten the frame and introduce noise. Color casts from a green wall or a red cloth can bounce onto skin tones and make editing harder. Texture and detail also matter: a busy backdrop can make the subject look less sharp because the eye has too many edges to compare. The most effective approach is to treat the background as part of the composition, not merely empty space behind the subject. That means scanning the frame edges, noticing lines that intersect heads or products, and controlling depth of field so the background supports the story. Small choices—moving a subject two steps forward, rotating a chair, or lowering the camera angle—can transform a distracting backdrop into a clean, intentional scene that feels designed rather than accidental.
Types of Photo Backgrounds: From Seamless Paper to Real Locations
Choosing the right photo background often begins with understanding the main categories available. Seamless paper rolls are popular for portraits and product work because they create a continuous tone without visible transitions. White, gray, and black are common, but fashion and editorial shooters also rely on colored rolls to set a specific vibe. Fabric backdrops—muslin, canvas, velvet—add texture and can be draped for a softer, more organic look. Vinyl backdrops are practical for high-volume work because they are easy to wipe and maintain consistent color. Each option has strengths and trade-offs: paper is clean but can tear, fabric is flexible but can wrinkle, and vinyl is durable but may reflect light if not positioned carefully. Understanding these materials helps match the backdrop to the intended use, whether it is a headshot session, a catalog shoot, or content for social media.
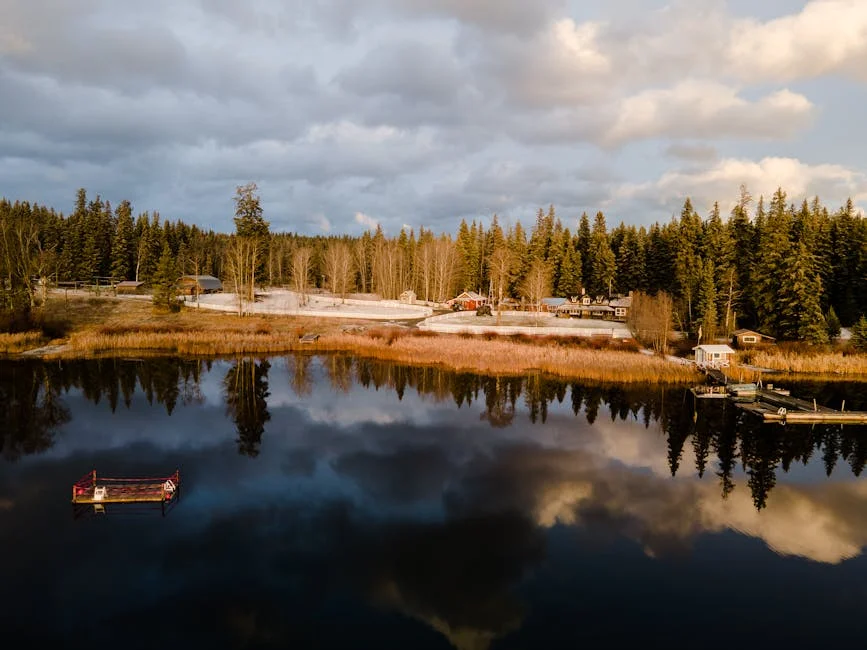
Real locations can be an equally powerful photo background, especially when authenticity is part of the goal. A café, a workshop, a home interior, or an outdoor wall can create narrative context that studio backdrops cannot. The challenge is controlling the visual noise: signage, clutter, harsh sunlight, and mixed lighting temperatures. Location backgrounds also change with time, weather, and foot traffic, so consistency can be harder to maintain across multiple sessions. Still, location-based backdrops can elevate a brand by making images feel lived-in and credible. The key is to pre-visualize: look for clean planes, repeating patterns, and areas where the subject can be separated from the background through distance and lens choice. When you treat a location like a set—moving chairs, simplifying surfaces, aligning lines—you gain most of the benefits of a natural environment while keeping the polish of a controlled shoot.
How Color Choice in a Photo Background Controls Mood and Branding
Color is one of the fastest ways a photo background can communicate emotion. Neutral tones like white, gray, beige, and charcoal tend to feel modern, minimal, and versatile. They keep attention on the subject and allow styling choices—wardrobe, props, packaging—to lead. Bright colors can feel playful, youthful, and energetic, while deep tones like navy, forest green, and burgundy can feel premium and cinematic. The background color also affects skin tones and product colors through reflected light. A warm-toned backdrop can add a subtle glow to portraits but may distort white products if not balanced. A cool-toned backdrop can make images feel crisp but may push skin toward a pale or bluish cast. The practical takeaway is to choose background colors that support the subject’s natural palette and the brand’s identity, then control lighting so the color reads consistently across frames.
Branding benefits when a photo background is selected with repeatability in mind. If a business uses the same two or three backdrop colors across product launches, the feed or catalog becomes instantly recognizable. Consistency also speeds up editing because white balance and contrast targets remain similar. For creators and small businesses, this can be as simple as establishing a “signature neutral” and a “seasonal accent” backdrop. The neutral option covers most needs, while the accent adds variety for campaigns. It is also useful to test how colors reproduce on different screens; a background that looks subtle on a calibrated monitor may appear overly saturated on a phone. When color is critical, capturing a reference frame with a color checker can help maintain accuracy. Ultimately, the best background color is the one that supports the subject’s message without demanding attention for itself.
Texture, Pattern, and Depth: Making the Background Interesting Without Distracting
Texture can make a photo background feel tactile and expensive, but it must be used with restraint. A lightly textured canvas backdrop can add depth to portraits, giving highlights and shadows something to interact with. Wood, concrete, plaster, and linen are frequently used textures because they read well on camera and feel natural. Patterned backgrounds—tiles, wallpaper, brick—can create strong visual rhythm, yet they also risk pulling focus away from the subject. The difference between “interesting” and “distracting” often comes down to scale and contrast. Small, high-contrast patterns create visual buzz, especially when paired with detailed clothing or hair. Larger, low-contrast patterns can provide character while still letting the subject dominate. If the background has a repeating pattern, positioning the subject so the pattern frames rather than intersects key features keeps the image clean.
Depth is another tool that helps a photo background support the subject instead of competing with it. Increasing the distance between subject and backdrop allows you to blur the background with a wider aperture, turning texture into a soft wash of tone. Even with modest lenses, stepping the subject forward can dramatically reduce the visibility of wrinkles and seams in fabric backdrops. Lighting also shapes texture: raking light from the side emphasizes surface detail, while flat frontal light minimizes it. For products, a subtle gradient background can look premium, especially when created with a light aimed at the backdrop rather than the subject. For portraits, a gentle shadow falloff can separate the subject and create dimension. The goal is to make the background feel intentional—present enough to add atmosphere, quiet enough to keep attention where it belongs.
Lighting Strategies That Transform Any Photo Background
Lighting determines how a photo background appears more than most people realize. The same white seamless can look pure white, light gray, or even off-white depending on exposure and how much light spills onto it. A controlled setup often uses separate lighting for the subject and the backdrop. By placing a light behind or to the side aimed at the background, you can create a halo effect, a gradient, or a clean high-key look. Conversely, keeping light off the backdrop by using flags or grids can turn a bright background into a darker tone, adding drama without changing the material. This level of control is especially useful for portraits and product photography where you want repeatable results. Even a single light can work if you understand distance: move the subject away from the background and bring the light closer to the subject to increase falloff, keeping the background darker and less distracting.
Mixed lighting can complicate background control. Overhead office lights, window light, and flash can all produce different color temperatures, causing the backdrop to shift in hue from frame to frame. A practical approach is to simplify: turn off ambient lights that introduce unwanted color, then shape the scene with one dominant light source. If shooting in a location, use the background as a clue—if it looks greenish or orange, the light is contaminating the scene. Adjusting white balance can help, but it is better to fix the light at capture by using gels, choosing a different angle, or repositioning the subject. For outdoor portraits, the background can be managed by placing the subject in open shade and letting the background fall into brighter light, or vice versa. When lighting and background are planned together, the final image looks cohesive, and editing becomes a refinement rather than a rescue. If you’re looking for photo background, this is your best choice.
Composition Tricks: Using the Background to Lead the Eye
Composition is where the photo background becomes an active design element. Lines in the background can point toward the subject, creating natural leading lines that guide attention. Doorways, arches, fences, and shadows can frame a person or product, adding structure and making the image feel intentional. The background can also be used to create negative space, which is valuable for marketing images that need room for text overlays. A simple wall with subtle texture can provide a clean area for copy, while the subject occupies one side of the frame. This is especially useful for banners, thumbnails, and social ads. Another powerful technique is controlling horizon lines and intersections: a line cutting across a subject’s neck or head can look awkward, while a line placed behind shoulders can add stability. Small shifts in camera height can remove distractions and improve the relationship between subject and backdrop.
Lens choice and camera position also shape how the background reads. A wide-angle lens includes more environment, making the background feel expansive and contextual, but it can introduce distortion near the edges. A longer lens compresses perspective, making background elements appear closer and larger behind the subject, which can be flattering if the backdrop is clean and attractive. Depth of field is part of composition too: a shallow depth makes the background soft, while a deeper depth keeps it detailed for storytelling. For product images, keeping vertical lines straight and backgrounds level can signal quality and professionalism. For portraits, placing the subject away from busy edges and avoiding high-contrast objects behind the head keeps the face dominant. When you compose with the background in mind, you reduce the need for heavy editing and create images that feel confident and polished. If you’re looking for photo background, this is your best choice.
Photo Background for Portraits: Clean, Flattering, and Consistent
Portrait photography benefits from a photo background that supports skin tones, wardrobe, and the intended message. For corporate headshots, neutral backdrops like light gray, medium gray, or off-white are popular because they look professional and keep attention on expression. For creative portraits, textured canvas or darker tones can add mood and sophistication. The most flattering portrait backgrounds usually avoid high contrast and busy detail around the face. If the background is brighter than the subject, the viewer’s eye may drift away from the person. If the background is too dark without separation, the subject can blend in. Separation can come from lighting, from color contrast, or from depth of field. A simple technique is to add a subtle rim light or hair light that outlines the subject against a darker backdrop, creating a clean edge without looking artificial.
Consistency matters when photographing teams, families, or multiple sessions over time. Using the same backdrop material, the same subject-to-background distance, and similar lighting ratios makes portraits feel like part of one set. This is important for company directories, actor headshots, and school portraits. It also simplifies retouching because skin tones and background tones are predictable. For home studios, a collapsible background can provide a repeatable look without requiring a large space. If space is limited, a backdrop stand with a neutral fabric and controlled lighting can still produce professional results; the key is to keep wrinkles minimal and to keep the subject far enough forward so the background falls slightly out of focus. When portraits are meant for social platforms, choosing a background that complements the brand palette can make the entire profile feel cohesive and intentional. If you’re looking for photo background, this is your best choice.
Photo Background for Product Photography: E-commerce and Advertising Needs
Product images demand a photo background that enhances clarity, communicates quality, and meets platform requirements. Many marketplaces prefer pure white backgrounds for consistency and easy comparison, especially for categories like apparel, electronics, and home goods. Achieving a true white background is not only about using white paper; it requires proper exposure and often separate background lighting so the product edges remain crisp without blowing out detail. For premium brands, light gray or subtle gradients can look more sophisticated than pure white while still feeling clean. Lifestyle product photography often uses contextual backgrounds—kitchen counters, desks, bathroom tiles—to show scale and use cases. In those scenes, the background should be styled with restraint so the product remains the hero. A cluttered environment can confuse the message and reduce conversion rates because the viewer is unsure what is being sold.
| Option | Best for | Pros | Cons |
|---|---|---|---|
| Solid color background | Product shots, headshots, clean layouts | Minimal distractions; easy to match brand colors; quick to edit | Can feel flat; shows shadows/lighting issues more |
| Gradient background | Portraits, marketing visuals, modern hero images | Adds depth; smoother separation from subject; more dynamic than solid | Can band/compress poorly; may clash with subject tones if overdone |
| Blurred (bokeh) background | Lifestyle photos, events, storytelling imagery | Strong subject focus; natural-looking context; hides clutter | Harder to control; inconsistent across a set; can reduce text readability |
Expert Insight
Choose a background that supports the subject, not competes with it: use simple colors or soft textures, and keep it a few feet behind your subject to reduce distractions and create natural separation. If you’re looking for photo background, this is your best choice.
Control the background with light and framing: turn the subject slightly away from busy areas, use a wider aperture or longer focal length to blur clutter, and adjust exposure so the background stays slightly darker than the face. If you’re looking for photo background, this is your best choice.
Texture and surface choice matter for products because reflections and shadows can either elevate or ruin the look. Glossy backdrops can create reflections that feel luxurious for cosmetics or jewelry, but they can also reveal dust and fingerprints. Matte surfaces are forgiving and often better for high-volume workflows. For small products, a sweep (a curved background that transitions from vertical to horizontal) eliminates the hard horizon line and creates a seamless look. For larger products, using a backdrop that extends across the floor and up the wall can maintain a clean studio aesthetic. Color accuracy is also crucial; a background that introduces color cast can make items look different from reality, increasing returns. Using consistent lighting and a neutral background helps maintain true product color. When the background is chosen with sales goals in mind, the images feel trustworthy and visually persuasive. If you’re looking for photo background, this is your best choice.
DIY and Budget-Friendly Background Ideas That Still Look Professional
A professional-looking photo background does not have to be expensive. Many creators build effective setups using affordable materials: large sheets of craft paper, poster board, bedsheets, curtains, or even painted foam boards. The key is controlling wrinkles, seams, and glare. Ironing fabric or choosing thicker cloth can prevent distracting creases. For paper backdrops, taping the top edge to a wall and letting it curve down to the floor can create a simple sweep. Painted walls can serve as a permanent background; matte paint in a neutral tone works well and reduces reflections. Another budget tactic is using a large diffusion curtain over a window to create soft light, then pairing it with a simple background that does not fight the subject. With careful placement and lighting, inexpensive materials can look clean and intentional, especially when the subject is separated from the background by distance and depth of field.
Household textures can also become compelling backgrounds when used thoughtfully. A wooden table, a linen cloth, a concrete patio, or a plain door can provide character without the cost of studio gear. The trick is to simplify the frame: remove clutter, choose one dominant texture, and keep colors coordinated. If you rely on a small space, consider portable options like collapsible backdrops or reversible boards with different finishes. For product shots, a two-board setup—one as the surface, one as the vertical background—can create endless combinations. For portraits, a neutral curtain or a clean wall with controlled lighting can produce a studio-like result. The goal is not to imitate a high-end studio perfectly, but to create a consistent, flattering environment where the subject stands out. With a repeatable DIY setup, content production becomes faster, and the overall look becomes more cohesive across platforms. If you’re looking for photo background, this is your best choice.
Editing and Background Replacement: Keeping Results Natural
Editing can refine a photo background, but the most natural results come from good capture decisions. Basic adjustments like leveling, cropping, removing small distractions, and smoothing minor wrinkles can dramatically improve the background without making it look fake. For studio backdrops, it is common to even out tones so the background looks consistent from edge to edge. For location images, removing a stray sign, a bright hotspot, or a small piece of litter can help the subject remain the focus. The challenge is maintaining believable texture and grain so the background still matches the subject. Over-smoothing can create a plastic look, especially when the subject remains sharp. A better approach is subtle: reduce contrast in distracting areas, darken bright patches, and keep a gentle gradient that feels like real light falloff.
Background replacement is useful when you need a different environment or a cleaner look, but it requires careful attention to edges, hair detail, and lighting direction. A subject lit from the left will look wrong against a background lit from the right, even if the cutout is technically perfect. Matching color temperature and contrast is essential, as is adding realistic shadow where the subject meets the ground or surface. For portraits, adding a slight blur to the replacement background can help integrate the subject, but blur should match the lens and distance implied by the scene. For products, shadows and reflections often determine whether a composite looks real. When replacing backgrounds for e-commerce, consistency across the catalog matters more than dramatic effects; a clean, repeatable look builds trust. Editing is most effective when it supports the original intent and preserves realism rather than trying to rescue a poorly planned scene. If you’re looking for photo background, this is your best choice.
Common Mistakes That Make a Photo Background Look Cheap
Many images fail not because the subject is uninteresting, but because the photo background introduces avoidable problems. Wrinkles in fabric backdrops are a frequent issue; they catch light and create lines that look messy. Seams, tape marks, and uneven paper edges can also break the illusion of a seamless studio. Another common mistake is placing the subject too close to the background, which causes harsh shadows and emphasizes texture or imperfections. This is especially noticeable with on-camera flash or a single hard light source. Busy backgrounds with high-contrast details—bright windows, cluttered shelves, random signage—pull attention away from the subject and make the image feel unplanned. Even a beautiful location can become distracting if the background contains multiple focal points competing with the main subject.
Color and exposure mistakes can also degrade the background’s quality. Overexposed backgrounds can lose detail and create a harsh, washed-out look, while underexposed backgrounds can become muddy and noisy. Mixed lighting can produce strange color casts that are hard to correct, such as green shadows from fluorescent lights or orange highlights from tungsten bulbs. Another subtle issue is perspective: tilted horizons, leaning vertical lines, and awkward camera angles can make a clean background feel unstable. For product photography, inconsistent background tone across a set makes a catalog look unprofessional. Avoiding these problems often comes down to a checklist mindset: scan edges, check for unwanted objects, control distance, and test exposure on the background separately from the subject. When these basics are handled, the background looks intentional, and the subject benefits immediately. If you’re looking for photo background, this is your best choice.
Choosing the Right Background for Social Media, Websites, and Print
The best photo background depends on where the image will be used. Social media often favors bold, simple backgrounds that read well on small screens. High contrast between subject and background helps stop scrolling, but overly saturated backdrops can make skin tones and product colors harder to control. For websites, backgrounds that leave room for text and cropping flexibility are valuable because banners and hero images are displayed in many aspect ratios. A background with clean negative space allows designers to place headlines without covering key details. For print, background quality becomes more critical because textures, banding, and noise can be more visible at larger sizes. A backdrop that looks fine on a phone may reveal wrinkles or uneven gradients in a poster or magazine spread. Considering final usage early helps you choose background materials, lighting, and composition that scale well.
Consistency across platforms is another factor. Brands often need a background style that works for thumbnails, product pages, email headers, and ads. That could mean sticking to a limited palette, using similar lighting, and selecting backdrops that do not clash with the brand’s typography and design system. If images will be used in multiple crops, shooting with extra space around the subject prevents awkward trimming. It is also helpful to consider accessibility and clarity: backgrounds that are too busy can reduce readability when text overlays are added. A practical approach is to create a small “background kit” for your most common needs: one neutral studio backdrop, one textured option for mood, and one lifestyle setting that matches the brand story. By matching background choices to the distribution channel, images look more intentional and perform better in real-world marketing contexts. If you’re looking for photo background, this is your best choice.
Building a Repeatable Workflow for Better Photo Background Results
Repeatability is what turns occasional good images into a reliable visual system. A workflow for photo background control starts with standardizing a few variables: backdrop material, subject distance, camera height, and lighting placement. Marking positions on the floor with tape can save time and keep sessions consistent. Keeping notes on camera settings and light power levels helps recreate a look later. For teams and businesses, documenting these choices means anyone can produce on-brand images without reinventing the setup. Repeatability also improves editing speed because the background tone, color, and contrast remain predictable. Even when using location backgrounds, you can build repeatability by identifying a few reliable spots with consistent light and clean surfaces, then shooting at similar times of day.
Preparation is part of workflow too. Backdrops should be stored properly to avoid creases, and surfaces should be cleaned to prevent dust spots that require retouching. A quick test shot before the subject arrives can reveal problems like hotspots, shadows, or color casts. If the goal is a clean white background, checking the histogram and ensuring the background is bright without clipping product edges prevents hours of correction. For darker backgrounds, controlling spill with flags or adjusting the angle of the key light keeps the backdrop rich and even. Over time, a repeatable process builds a recognizable style, which is valuable for personal branding and commercial work alike. When the background is managed systematically, creative energy can go into expression, styling, and storytelling rather than fixing avoidable distractions later. If you’re looking for photo background, this is your best choice.
Final Thoughts: Making the Photo Background Work for You Every Time
The most effective photo background is the one that supports your subject’s message, matches the intended mood, and stays consistent with how and where the image will be used. Whether you choose seamless paper, textured fabric, a painted wall, or a real-world location, the background should feel intentional rather than accidental. Paying attention to color, texture, distance, composition, and lighting will do more for image quality than chasing complicated gear. Small habits—scanning the frame edges, controlling spill, separating subject from backdrop, and keeping materials clean—create a noticeable jump in professionalism. When the background is treated as part of the design, images become easier to edit, more cohesive across a series, and more persuasive for viewers.
Strong results come from balancing simplicity with purpose: a clean backdrop for clarity, a textured surface for mood, or a contextual scene for storytelling, all guided by consistent lighting and thoughtful framing. Over time, developing a small set of reliable backdrop options and a repeatable setup makes content creation faster and more confident. The viewer may not consciously describe why an image feels polished, but they feel it immediately when the background is calm, coordinated, and aligned with the subject. With each shoot, refine what you use, note what works, and keep building a visual library that fits your style. When you do, your photo background stops being a problem to solve and becomes a tool you can rely on in every session.
Watch the demonstration video
In this video, you’ll learn how to choose and create photo backgrounds that make your subject stand out. It covers simple ways to control color, texture, and lighting, avoid distracting elements, and match the background to your style—whether you’re shooting portraits, products, or everyday scenes.
Summary
In summary, “photo background” is a crucial topic that deserves thoughtful consideration. We hope this article has provided you with a comprehensive understanding to help you make better decisions.
Frequently Asked Questions
What is a photo background?
A photo background is the area behind the subject in an image, such as a wall, scenery, backdrop paper, or a digitally added scene.
How do I choose the right background for a portrait?
Pick a background that’s simple, uncluttered, and complementary in color and brightness so it doesn’t compete with the subject.
How can I blur the background (bokeh) in-camera?
To create a beautifully blurred **photo background**, shoot with a wide aperture (a low f-number), place more distance between your subject and the background, and use a longer focal length while keeping your focus locked on the subject.
What are common types of studio backgrounds?
Seamless paper, muslin fabric, vinyl backdrops, painted canvases, and collapsible pop-up backgrounds.
How do I remove or change a photo background?
Use selection tools or an AI background remover in your editing app to cut out the subject, then fine-tune the edges for a clean finish. Finally, swap in a new **photo background** and adjust the lighting and colors so everything blends naturally.
How do I avoid distracting backgrounds when shooting?
Check the edges of your frame for anything distracting, then try shifting your angle or repositioning your subject. Simplify the scene by removing clutter and, when possible, use a shallow depth of field to blur the **photo background** so your subject stands out.
📢 Looking for more info about photo background? Follow Our Site for updates and tips!

Trusted External Sources
- Blur Photo Background – App Store – Apple
Blur Background makes it easy to soften the photo background of any picture in just a few taps. Instantly blur distracting objects, faces, or anything else you’d rather keep out of focus.
- How to set matched photo as V-Ray background image? – Extensions
Oct 24, 2026 … After matching photo select the zoom tool and type exactly the same fov value you are getting. This way you get the same view without background which you can … If you’re looking for photo background, this is your best choice.
- How do I get a black background in my pictures? This is the … – Reddit
Mar 19, 2026 … Photographically you can get a dark background by using flashes (not the one in your camera!) synched with a short exposure time. That way the … If you’re looking for photo background, this is your best choice.
- Amazon.com: Photographic Studio Photo Backgrounds
Create a clean, professional look for any shoot with this 10×10 ft white backdrop curtain. Made from durable polyester fabric and designed with a double-sided finish, it delivers a smooth, consistent **photo background** for portraits, product photography, and studio setups—helping your images look crisp, bright, and polished every time.
- What are good backgrounds for photos of minis? : r/minipainting
Feb 8, 2026 … I havent really got any good photos of my 40k stuff with nice backgrounds (mostly my kitchen and work area) does anyone know a quick way to … If you’re looking for photo background, this is your best choice.