A high resolution background remover is designed to separate a subject from its surroundings while preserving the fine detail that makes an image look realistic at full size. The difference between a basic cutout tool and a high resolution background remover becomes obvious the moment you zoom in: hair strands, soft fabric edges, translucent materials, and tiny product contours can look jagged or “bitten” when the extraction is done with low-quality masking. High-resolution removal prioritizes edge fidelity, anti-aliasing, and clean mattes so the subject can be placed on a new background without visible halos. It also aims to keep texture detail intact, which matters for e-commerce photography, print assets, and marketing graphics that may be reused across banners, catalogs, and large-format displays. A good workflow doesn’t just delete pixels; it interprets boundaries, preserves semi-transparent regions like veils or glass, and produces an output that remains sharp when exported at the original dimensions. That means it must handle complex edges and color contamination, where the old background bleeds into the subject. When the background is removed properly, the subject remains natural, with accurate color and no fringing, even when placed over a contrasting color or a patterned scene.
Table of Contents
- My Personal Experience
- Understanding What a High Resolution Background Remover Really Does
- Why High Resolution Matters for Background Removal Outcomes
- Common Use Cases: E-commerce, Marketing, Print, and Creative Production
- How AI Segmentation and Image Matting Work at High Resolution
- Key Features to Look for in a High Resolution Background Remover
- Workflow Tips for Cleaner Edges, Hair Detail, and Transparent Objects
- High Resolution Output Formats: PNG, TIFF, WebP, and When to Use Each
- Expert Insight
- Balancing Speed and Precision in Batch Background Removal
- Common Problems: Halos, Jagged Edges, Missing Details, and How to Fix Them
- Choosing Between Online Tools, Desktop Software, and API-Based Solutions
- Practical Quality Checklist for Professional High-Resolution Cutouts
- Getting the Best Results from a High Resolution Background Remover Over Time
- Watch the demonstration video
- Frequently Asked Questions
- Trusted External Sources
My Personal Experience
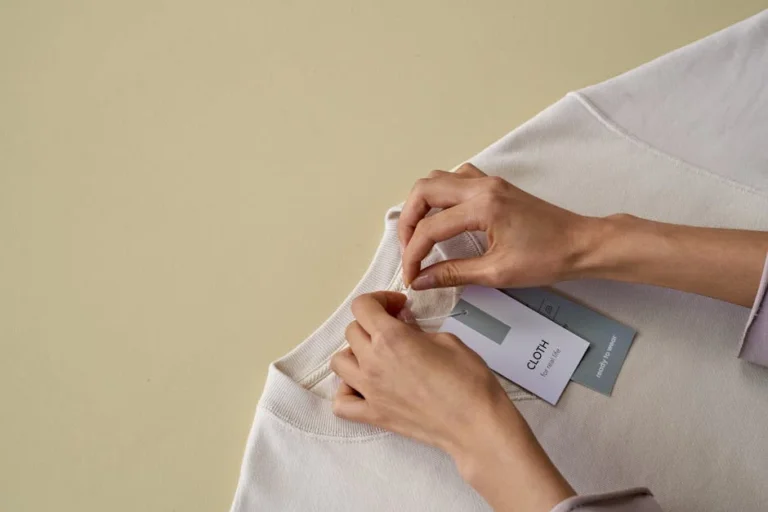
I recently had to create product photos for my small online shop, and my phone shots looked fine except for the cluttered backgrounds. I tried a high resolution background remover after a few low-quality tools left jagged edges around glass and hair, and the difference was immediate—the cutouts stayed sharp even when I zoomed in or exported for larger listings. It handled tricky details like transparent packaging and thin straps without turning them into blurry blobs, so my images didn’t look “edited.” I still did a quick manual touch-up on a couple of shadows, but overall it saved me hours compared to masking everything by hand in an editor.
Understanding What a High Resolution Background Remover Really Does
A high resolution background remover is designed to separate a subject from its surroundings while preserving the fine detail that makes an image look realistic at full size. The difference between a basic cutout tool and a high resolution background remover becomes obvious the moment you zoom in: hair strands, soft fabric edges, translucent materials, and tiny product contours can look jagged or “bitten” when the extraction is done with low-quality masking. High-resolution removal prioritizes edge fidelity, anti-aliasing, and clean mattes so the subject can be placed on a new background without visible halos. It also aims to keep texture detail intact, which matters for e-commerce photography, print assets, and marketing graphics that may be reused across banners, catalogs, and large-format displays. A good workflow doesn’t just delete pixels; it interprets boundaries, preserves semi-transparent regions like veils or glass, and produces an output that remains sharp when exported at the original dimensions. That means it must handle complex edges and color contamination, where the old background bleeds into the subject. When the background is removed properly, the subject remains natural, with accurate color and no fringing, even when placed over a contrasting color or a patterned scene.

High resolution background remover tools typically rely on advanced segmentation methods, including AI-based matting and classic selection refinement, to produce a mask that can scale to modern camera outputs. Images from current smartphones and DSLRs often exceed 12MP, and professional product shots can be far larger. At those sizes, every small defect becomes visible, especially on white or solid-color backdrops. A high resolution background remover therefore needs to produce masks at full resolution rather than downscaling for speed and then upscaling, which can introduce rough edges. It also needs export options that preserve transparency correctly, such as PNG or TIFF with alpha channels, and support for color management so the cutout doesn’t shift tone after processing. The best results come from understanding the image content: glossy surfaces reflect the environment; hair and fur require probabilistic edges; and shadows may need to be kept or reconstructed for realism. When background removal is treated as a careful compositing step instead of a quick deletion, the final asset becomes reusable, consistent, and professional across many placements.
Why High Resolution Matters for Background Removal Outcomes
High resolution changes everything about how background removal should be evaluated. At small sizes, a rough selection might look acceptable, but when the same cutout is used in a hero banner, a print brochure, or a marketplace zoom view, defects become obvious. A high resolution background remover is valuable because it maintains edge smoothness at the pixel level and avoids the “stair-step” effect that appears on diagonal lines, jewelry chains, or product silhouettes. It also helps preserve micro-detail, like the weave of fabric near an edge, the fine serration of leaves, or the soft gradient of a shadow under a product. These details contribute to perceived quality, and perceived quality influences trust, click-through rate, and conversion. For brands, consistent clean cutouts across a catalog reduce visual noise and make the storefront look curated. For creators, high-res cutouts allow the same asset to be reused across multiple layouts and formats without having to redo the extraction each time. The time saved compounds when there are hundreds or thousands of images to process.
Resolution also impacts how color spill and fringing appear. When a subject is photographed against a green or brightly colored backdrop, light reflects and tints the edges of the subject, especially in semi-transparent areas. At low resolution, that spill is blurred into fewer pixels and may not be noticed; at high resolution, it becomes a visible outline when placed on a different background. A high resolution background remover should include decontamination features or edge color correction so the subject’s boundaries match the new environment. Additionally, high-resolution workflows need to respect compression artifacts. Many images arrive as JPEGs with mosquito noise around edges, and aggressive background removal can amplify those artifacts. Better tools detect and mitigate edge noise, producing a cleaner alpha channel. When the goal is a professional composite, high resolution is not a luxury; it is the baseline requirement for modern digital storefronts, editorial layouts, and social ads where images are repurposed at multiple sizes and displayed on high-density screens.
Common Use Cases: E-commerce, Marketing, Print, and Creative Production
One of the most common reasons people seek a high resolution background remover is e-commerce. Marketplaces and brand websites often require clean backgrounds, consistent framing, and high-detail product edges. Shoes, cosmetics, electronics, and jewelry all benefit from precise extraction, because customers zoom in to inspect materials and craftsmanship. A clean cutout also makes it easier to create variant images: white background for compliance, lifestyle background for ads, and seasonal themes for promotions. When the extraction is done at high quality, the same product can be placed into multiple scenes without rework. For teams managing large catalogs, this consistency reduces returns caused by misleading visuals and improves brand perception. It also supports automated layout templates, because a transparent background allows products to be positioned reliably within design systems. A high resolution background remover becomes part of a pipeline that turns raw photography into storefront-ready assets quickly.
Marketing teams also rely on background removal for banners, landing pages, and social creative. High-resolution cutouts make it easier to layer subjects with gradients, typography, and motion graphics. In print, the stakes are even higher: a jagged edge or halo that might be hidden on a phone can stand out on a poster or magazine spread. Designers often need PNG or TIFF assets with clean transparency so the subject can be composited over textured paper, colored blocks, or photographic backgrounds. Creative production adds another layer: portraits with hair, fashion shots with sheer fabrics, and food photography with steam or glassware demand nuanced masks. A high resolution background remover that can preserve semi-transparent details helps maintain realism. Even for corporate headshots, a precise extraction can keep natural hair edges and avoid the “sticker” look. Across these use cases, the goal is the same: preserve authenticity while enabling flexible background changes without sacrificing sharpness or detail.
How AI Segmentation and Image Matting Work at High Resolution
Modern high resolution background remover tools often combine semantic segmentation and image matting. Segmentation identifies what is foreground versus background, usually by recognizing objects such as people, animals, products, or vehicles. Matting goes further by estimating partial transparency at the edges, producing an alpha channel that can represent fine detail like hair, fur, smoke, or motion blur. The best tools don’t simply draw a hard outline; they calculate a soft transition where needed, so the subject blends naturally into a new scene. High-resolution processing means these calculations happen at or near the original pixel dimensions rather than a heavily downscaled proxy. Some systems use a two-step approach: first a fast coarse mask, then a refinement stage focused on edges and difficult regions. This helps maintain performance while still generating a detailed matte. When done well, the alpha channel looks smooth and continuous, without chunky steps or unnatural cut lines.
High-resolution matting also involves dealing with color spill and edge contamination. When a subject is photographed against a bright background, the edge pixels are often a mixture of subject color and background color due to lens blur, sensor sampling, and compression. A high resolution background remover may apply edge decontamination to reduce the old background’s color influence while preserving the subject’s natural shading. Another challenge is texture continuity: if the tool over-smooths edges, it can erase fine details like hair tips or lace patterns. If it under-smooths, it can leave jagged noise. Advanced methods use edge-aware filtering and confidence maps to decide where to keep crisp boundaries and where to allow softness. For products, the ideal is often a clean, crisp edge; for portraits, a more natural soft edge is needed. Understanding these underlying mechanics helps you choose settings and workflows that match your content rather than applying a one-size-fits-all approach.
Key Features to Look for in a High Resolution Background Remover
Not all tools marketed as high quality actually deliver high-resolution outputs suitable for professional work. A true high resolution background remover should support full-size processing and export without forcing a reduced resolution unless you opt in. It should provide transparency-preserving formats and control over edge refinement. Look for features like feathering, contrast adjustment for masks, edge shift, and decontamination, because these controls help correct common problems such as halos or clipped edges. Batch processing can be essential for catalog workflows, but it should not sacrifice quality; the tool should apply consistent settings and preserve metadata when possible. Another important feature is the ability to handle complex subjects: hair, fur, reflective products, transparent bottles, and thin structures like bicycle spokes. A robust tool should also allow manual touch-ups, such as brush-based add/subtract or guided refinement, because even the best automation can struggle with certain images.
Export and integration options matter as much as the removal quality. If your workflow includes design software, you may need PSD export with masks, or you may need API access to integrate a background removal step into a content pipeline. Color management support helps avoid unexpected shifts when moving between tools, especially for print. Pay attention to how the tool handles shadows: some removers delete everything, leaving the subject floating unnaturally. Better systems allow you to preserve natural shadows as a separate layer or reconstruct a subtle shadow on a new background. Also consider privacy and licensing: uploading product photos or client portraits to a cloud service may require compliance with internal policies. A high resolution background remover that offers local processing or clear data handling terms can be important for agencies and enterprises. Ultimately, the right feature set depends on whether you prioritize speed, edge perfection, batch volume, or creative control.
Workflow Tips for Cleaner Edges, Hair Detail, and Transparent Objects
Even with a strong high resolution background remover, the input image quality and preparation steps heavily influence the output. Start by using the highest-quality source available, ideally a minimally compressed file. If you must work with JPEGs, avoid repeatedly saving and re-saving, which compounds artifacts around edges. Lighting also matters: a subject with clear separation from the background is easier to extract cleanly. For product photography, using a consistent backdrop and controlled lighting reduces color spill and makes edge detection more reliable. When removing backgrounds from portraits, pay attention to flyaway hair and motion blur; these areas benefit from matting rather than hard selection. If your tool offers a “hair mode” or “fine detail” refinement, use it selectively on the regions that need it rather than globally, because global refinement can introduce softness where you want crisp edges.
Transparent and reflective objects require special handling. Glass, plastic, and glossy packaging often reflect the original background; removing the background does not remove the reflection, which can look odd on a new scene. In these cases, a high resolution background remover that supports partial transparency and allows manual mask painting is valuable. You may need to preserve certain background reflections to maintain realism, or rebuild highlights with subtle overlays. Another practical tip is to check the cutout against multiple test backgrounds: pure white, pure black, and a saturated color. Halos and fringing that are invisible on one background often appear on another. Zoom in to 200–400% to evaluate edge quality and look for “chatter” (small jagged variations) along smooth curves. If the tool supports edge shift or mask smoothing, apply small adjustments rather than heavy corrections. The goal is to keep the subject’s true shape while removing distracting artifacts, ensuring the cutout remains believable at full resolution.
High Resolution Output Formats: PNG, TIFF, WebP, and When to Use Each
Choosing the right export format is a crucial part of any high resolution background remover workflow. PNG is widely used because it supports transparency and is broadly compatible across browsers and design tools. For web use, PNG is often the default for transparent cutouts, but file sizes can become large at high resolution, especially for photographic subjects with soft edges. WebP can reduce file size significantly while still supporting transparency, making it a strong option for modern websites that prioritize performance. However, compatibility and tooling should be considered; while WebP is widely supported in current browsers, some older pipelines and legacy software may still prefer PNG. TIFF is common for print and professional retouching because it can store high bit depth, preserve quality, and handle alpha channels reliably. If you’re working with a print vendor or a high-end design workflow, TIFF can be the safer choice for preserving detail and avoiding compression artifacts.
| Feature | High‑Resolution Background Remover | Standard Background Remover |
|---|---|---|
| Output quality | Preserves fine edges (hair/fur), cleaner cutouts, fewer artifacts at large sizes | More edge fringing and artifacts, especially when enlarged |
| Supported resolution | Optimized for high‑MP images and large exports (print, 4K+) | Best for web-sized images; quality drops on large exports |
| Best use cases | Product photos, portraits, banners, print-ready marketing assets | Quick social posts, thumbnails, drafts, low‑to‑mid resolution assets |
Expert Insight
Start with the highest-quality source image available and avoid upscaling before removal. If possible, export or capture in a lossless format (like PNG or TIFF) to preserve edge detail, then remove the background at full resolution so hair, fabric, and fine outlines stay crisp. If you’re looking for high resolution background remover, this is your best choice.
Refine the cutout by zooming in and correcting edges with a small feather (1–2 px) and selective decontamination to prevent halos. Afterward, place the subject on the new background and check at 100% and 200% zoom; adjust edge contrast and add a subtle shadow to match the scene’s lighting for a natural, high-resolution finish. If you’re looking for high resolution background remover, this is your best choice.
Color profiles and bit depth also matter when exporting. Some workflows require sRGB for web consistency, while print may require Adobe RGB or CMYK conversions downstream. A high resolution background remover that preserves embedded profiles can prevent color surprises. Another consideration is whether you need a hard transparency edge or a soft matte. Soft mattes look more natural for hair and semi-transparent materials, but they can reveal compression artifacts if the format is lossy. If you must use a lossy format, test carefully to ensure edge quality remains acceptable. Also consider whether you need a layered file for future edits. Some tools allow exporting a layered PSD with the mask intact, which is useful when art direction changes and you need to refine the cutout without starting over. The best approach is to match the format to the destination: web performance, marketplace requirements, print fidelity, or iterative design collaboration.
Balancing Speed and Precision in Batch Background Removal
Batch processing is where many teams feel the tension between speed and quality. A high resolution background remover used for hundreds of images must be fast enough to keep up with production, but precise enough to avoid costly rework. The key is to standardize inputs as much as possible: consistent lighting, consistent background color, and consistent camera settings reduce variability and improve automation success. When images share a similar setup, you can apply the same removal parameters across the batch and expect consistent results. It also helps to define acceptable tolerances. For example, a minor softness around hair might be acceptable for small thumbnails but not for zoom views. You can create tiers: a fast automated pass for most images and a manual refinement queue for the exceptions. This approach keeps throughput high while reserving human attention for the difficult cases.
Quality control is essential in batch workflows. Sampling a subset of outputs at high zoom can reveal systematic issues such as consistent halos, clipped edges, or lost shadows. If you catch these early, you can adjust settings and rerun the batch before the assets are distributed across channels. Another strategy is to output masks alongside cutouts, enabling quick corrections without reprocessing from scratch. Some pipelines benefit from generating both a transparent cutout and a version on a standard background, which helps stakeholders review images quickly. If the tool provides an API, automation can include naming conventions, folder structures, and metadata handling, reducing operational friction. The goal is not just to remove backgrounds quickly, but to create reliable high-resolution assets that don’t break when reused in new layouts, resized for ads, or printed. A well-planned batch workflow turns a high resolution background remover into a scalable production system rather than a one-off editing trick.
Common Problems: Halos, Jagged Edges, Missing Details, and How to Fix Them
Even the best high resolution background remover can produce artifacts, especially when the source image has challenging edges or compression noise. Halos are among the most common issues: a light or dark outline appears around the subject when placed on a new background. Halos often come from background color contamination or from an overly feathered mask. Fixing them may require edge decontamination, reducing feathering, or shifting the mask edge inward by a small amount. Jagged edges can appear when the mask is too sharp or when the tool effectively traces pixel steps without enough anti-aliasing. Smoothing the mask slightly, increasing edge refinement quality, or using a higher-detail mode can help. However, over-smoothing can erase fine detail, so adjustments should be incremental and evaluated at 100% zoom or higher.
Missing details are another frequent complaint, especially with hair, fur, lace, and thin objects. If the removal tool treats these regions as background noise, it may cut them off, creating an unnatural silhouette. In those cases, using a matting-focused setting or manually painting the mask can restore realism. Transparent objects create a different kind of problem: the tool might remove the background but also remove the object’s subtle transparency cues, making glass look like a solid shape. Preserving partial transparency in the alpha channel is essential, and sometimes you need to keep a faint remnant of the original background reflections to maintain believable highlights. Shadows can be lost entirely, causing products to float. A practical fix is to preserve the shadow layer separately or recreate a soft shadow under the subject after compositing. The most reliable troubleshooting method is to test the cutout on multiple backgrounds, examine edges at high zoom, and correct the mask using targeted refinements rather than applying heavy global changes that degrade the subject’s natural detail. If you’re looking for high resolution background remover, this is your best choice.
Choosing Between Online Tools, Desktop Software, and API-Based Solutions
The best high resolution background remover for your needs depends on where and how you work. Online tools are convenient and often fast to start, requiring no installation. They can be ideal for occasional use, quick marketing assets, or small teams that need a simple upload-and-download process. However, online processing can raise concerns about privacy, file size limits, and consistent output control. Desktop software offers more control and can be better for professionals who need advanced masking tools, layered exports, and local processing for sensitive images. Desktop workflows also tend to integrate better with retouching steps like color correction, dust cleanup, and sharpening, which often follow background removal in product photography pipelines. If you regularly handle high-resolution files, local processing can also be more predictable, avoiding upload bottlenecks and network constraints.
API-based solutions are increasingly popular for businesses that need background removal at scale. An API can automatically process images as they are uploaded to a catalog system, DAM, or CMS, generating transparent cutouts and standardized derivatives. This is where a high resolution background remover becomes part of infrastructure rather than a manual task. The trade-offs include engineering effort, monitoring, and the need to handle edge cases programmatically. Some teams adopt a hybrid approach: API automation for the bulk of images and a desktop tool for manual refinement of difficult assets. When evaluating options, consider output resolution limits, mask quality consistency, supported formats, and how easily you can rerun processing with updated settings. Also consider governance: who approves final assets, how revisions are tracked, and how you ensure that the cutout quality remains consistent across seasons, campaigns, and product lines. The right choice aligns with your volume, quality expectations, and operational constraints.
Practical Quality Checklist for Professional High-Resolution Cutouts
A repeatable checklist helps ensure that every high resolution background remover output meets a consistent standard. Start with edge inspection at 100% zoom: look for halos, jagged steps, and missing micro-details. Move to 200–400% zoom for hair, fur, and intricate product areas like watch hands, rings, or textured packaging edges. Next, test the cutout on at least three backgrounds: white, black, and a saturated color like blue or magenta. This quickly reveals fringing and transparency issues that might be hidden on the intended background. Check for unintended holes within the subject, especially in dark clothing or near shadows where the tool might have misclassified regions. If the subject includes transparent parts, verify that partial transparency looks natural and doesn’t create harsh borders. For products, ensure the silhouette remains true and not “shrunk” by aggressive edge shifting.
Then evaluate realism: does the subject look like it belongs when placed on a neutral background? If not, the issue might be missing shadows or inconsistent lighting. Consider whether you should preserve the original shadow, create a new one, or slightly adjust the subject’s contrast to match the new environment. Also verify export settings: transparency should be clean, and the file should be saved in a format appropriate for its destination. For web, confirm that the file size is reasonable and that edges remain clean after any compression. For print, ensure resolution and color profile requirements are met. Finally, confirm consistency across a set: if you processed multiple images, compare them side by side to ensure that edge softness, shadow treatment, and framing feel uniform. A high resolution background remover can deliver excellent results, but consistent professional output comes from disciplined review and small, targeted corrections that preserve the subject’s natural detail.
Getting the Best Results from a High Resolution Background Remover Over Time
Long-term success with a high resolution background remover comes from building a workflow that improves with repetition. Start by documenting preferred settings for different categories: portraits, apparel, glossy products, transparent bottles, and flat-lay items. Over time, you’ll learn which images need extra refinement and which can be processed automatically. If you manage photography, adjust the capture process to support easier extraction: use consistent backdrops, control spill with distance between subject and background, and avoid heavy background wrinkles that confuse edge detection. For portraits, consider lighting that separates hair from the background, such as a subtle rim light, while keeping skin tones natural. These decisions reduce editing time and improve output quality. When you treat background removal as part of production planning rather than a rescue step, the quality becomes more predictable and the results look more premium.
Asset management also matters. Save master cutouts in a lossless format with transparency, and generate derivatives for each channel from that master. This prevents quality degradation from repeated edits and exports. Keep masks when possible, because art direction changes are common: a client may want a different crop, a different background color, or a new layout that reveals more edge detail. With a saved mask, updates are far quicker. If you’re working in teams, establish naming conventions and review standards so that every editor produces consistent results. Finally, evaluate outputs in real contexts, not just on a transparent canvas. Place the cutout into the types of backgrounds it will actually appear on, and verify that edges remain clean at the target sizes. A high resolution background remover is most valuable when it produces assets that stay reliable across reuse, resizing, and repurposing, and that reliability comes from a combination of good tools, good inputs, and a consistent quality process that keeps the keyword promise of “high resolution” true in every deliverable.
Watch the demonstration video
In this video, you’ll learn how to remove backgrounds in high resolution without losing detail or creating jagged edges. It covers the best tools and settings for clean cutouts, preserving hair and fine textures, and exporting transparent PNGs or new backgrounds for professional-looking results in photos, product shots, and graphics. If you’re looking for high resolution background remover, this is your best choice.
Summary
In summary, “high resolution background remover” is a crucial topic that deserves thoughtful consideration. We hope this article has provided you with a comprehensive understanding to help you make better decisions.
Frequently Asked Questions
What is a high resolution background remover?
A **high resolution background remover** is a tool that cleanly removes an image’s background while keeping every fine detail intact—even at large sizes like 4K and beyond—so edges stay smooth and the subject looks sharp, with minimal artifacts or quality loss.
How do I keep the output in high resolution?
For the best results, upload the original full-size image (skip any in-app resizing or compression), then use a **high resolution background remover** and export your final file in a lossless format like PNG or TIFF at the original pixel dimensions.
Which file formats work best for high-res background removal?
For the cleanest cutouts and maximum detail, begin with the best source file you have—RAW, TIFF, or a high-quality JPG—then export your final image as PNG or TIFF to preserve transparency and sharp edges, especially when using a **high resolution background remover**.
Why do edges look jagged or blurry after removing the background?
Blurry cutouts often happen because the original image is low-res, heavy smoothing or compression has softened the details, or the subject doesn’t stand out clearly from the background. For cleaner results, use a **high resolution background remover** and fine-tune the mask by feathering edges, decontaminating colors, and improving subject separation for a sharper, more natural outline.
Can a high-res background remover handle hair, fur, or transparent objects?
Yes—though the quality can vary widely. For the cleanest cutouts, use a **high resolution background remover** that offers advanced matting, edge refinement, and solid transparency handling, and be prepared to do a few manual touch-ups for tricky details like hair, fur, or semi-transparent edges.
Is it possible to remove backgrounds in bulk without losing quality?
Yes—use batch processing that preserves original dimensions and exports in PNG/TIFF, and verify settings disable auto-downscaling and extra compression.
📢 Looking for more info about high resolution background remover? Follow Our Site for updates and tips!

Trusted External Sources
- What is everyone using for background removal for images … – Reddit
Oct 6, 2026 … For high-quality background removal that supports 4K resolution … resolution, no signup https://fileconv.online/remove-bg · scubapig.
- Online Image Background Remover – Canva
Remove the background from your image in seconds with our **high resolution background remover**. Once you’re happy with the result, download your design—free, as a crisp high‑resolution PNG—then move on to the next step.
- Looking for high quality BG remover software – Reddit
Jun 30, 2026 … I’m searching for a **high resolution background remover** that can cleanly remove the background from photos of people—without needing extra editing steps or add-ons afterward.
- FREE HD Background Remover – Remove Bg Online | Craiyon
Craiyon’s **high resolution background remover** uses advanced AI to remove backgrounds in seconds with impressive accuracy. It cleanly separates your subject from the scene while preserving fine details like hair, edges, and textures—so your images look sharp, professional, and ready to use anywhere.
- Magic Eraser Background Editor – App Store – Apple
Instantly erase backgrounds or unwanted objects, refine every detail with smart editing tools, and export crisp, high-quality PNGs or JPGs—no watermark needed. With our **high resolution background remover**, your images stay clean, sharp, and ready for anything.