Searching for remove background high quality free is no longer a niche need reserved for designers with expensive software. It has become a daily requirement for online sellers, marketers, students, recruiters, and creators who need clean, professional-looking images without a budget for subscription tools. A background-free photo helps a product look sharper on marketplaces, makes profile pictures appear more polished on social platforms, and allows brand assets to be reused across banners, flyers, and ads without clashing colors or distracting scenery. When the background is removed cleanly, edges look natural, hair strands remain believable, and the subject blends into new layouts without the “cut-out sticker” effect. That’s why people specifically combine three expectations in one search: quality, cost, and speed. They want a result that rivals premium tools while staying accessible and easy to repeat.
Table of Contents
- My Personal Experience
- Why “remove background high quality free” matters for modern visuals
- What “high quality” really means when you remove a background for free
- Choosing free tools that can remove background in high quality without hidden compromises
- Getting better results by preparing your image before you remove background for free
- Step-by-step workflow for “remove background high quality free” with reliable consistency
- Handling hair, fur, and fine edges when you remove background in high quality for free
- Removing backgrounds for product photos: clean edges, true colors, and marketplace readiness
- Expert Insight
- Removing backgrounds for portraits and profile photos without losing realism
- Free editing techniques to polish the cutout after background removal
- Batch processing: how to remove background high quality free for multiple images efficiently
- Common mistakes that lower quality when you remove background for free (and how to avoid them)
- Privacy, licensing, and safe use when you remove background high quality free
- Final thoughts on achieving remove background high quality free results every time
- Watch the demonstration video
- Frequently Asked Questions
- Trusted External Sources
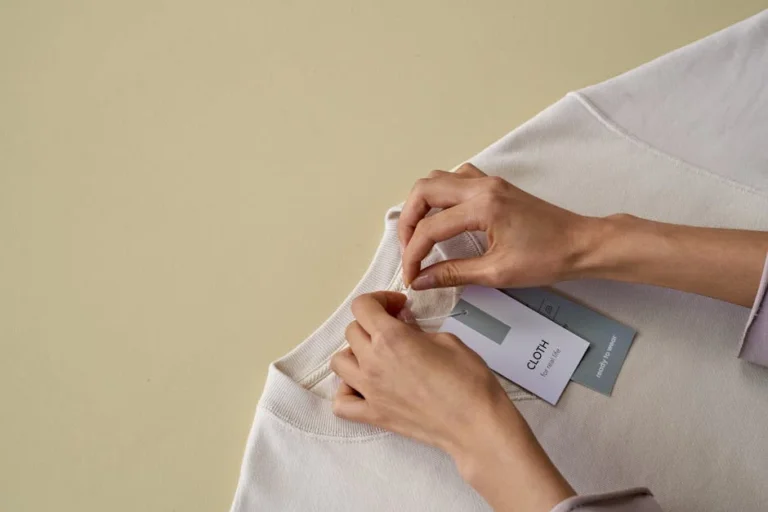
My Personal Experience
I needed to remove the background from a few product photos for my small online shop, but I didn’t want to pay for another subscription. I tried a couple of “free” tools that left jagged edges or blurry halos around the item, especially near hair and transparent packaging, and it looked unprofessional. After some trial and error, I found a free background remover that exported in high quality and kept the edges clean, then I touched up a few spots with the erase/restore brush. It saved me hours compared to doing it manually, and the final PNGs looked sharp on both my website and social posts without that obvious cutout look. If you’re looking for remove background high quality free, this is your best choice.
Why “remove background high quality free” matters for modern visuals
Searching for remove background high quality free is no longer a niche need reserved for designers with expensive software. It has become a daily requirement for online sellers, marketers, students, recruiters, and creators who need clean, professional-looking images without a budget for subscription tools. A background-free photo helps a product look sharper on marketplaces, makes profile pictures appear more polished on social platforms, and allows brand assets to be reused across banners, flyers, and ads without clashing colors or distracting scenery. When the background is removed cleanly, edges look natural, hair strands remain believable, and the subject blends into new layouts without the “cut-out sticker” effect. That’s why people specifically combine three expectations in one search: quality, cost, and speed. They want a result that rivals premium tools while staying accessible and easy to repeat.

Quality is the main reason the phrase includes “high quality,” because many free background remover options create jagged edges, blur details, or leave halos around the subject. Those issues become obvious on white backgrounds, on high-resolution product listings, and in print materials. When someone needs a remove background high quality free workflow, they also need predictable output: consistent transparency, correct subject selection, and file formats that preserve detail. The best approach is not just picking a single tool, but understanding what makes a clean cutout, which image types work best, and how to finish the result with small refinements. Even if you rely on free solutions, you can get premium-looking outcomes by using the right input photos, controlling compression, and applying light touch-ups. With a little process, free background removal can produce results suitable for e-commerce catalogs, LinkedIn headshots, brand presentations, and social media campaigns.
What “high quality” really means when you remove a background for free
High quality background removal is easy to recognize and surprisingly specific. The most important marker is edge fidelity: the border around the subject should match the original photo’s detail without looking artificially sharpened or overly softened. For example, hair, fur, thin straps, and semi-transparent materials like veils or glass require careful handling. When a free background remover cuts those areas too aggressively, you get missing strands and harsh edges; when it is too conservative, you get remnants of the original background. A truly remove background high quality free result preserves fine detail while removing distracting pixels. Another key indicator is correct transparency. The background should be fully transparent where it needs to be, without checkerboard artifacts baked into the export. If the tool outputs a PNG, the transparency should remain intact across editors and platforms.
Color spill and halos are another quality test. Many photos have a colored environment—green grass, blue sky, warm indoor lighting—that reflects onto the subject edges. Lower-quality cutouts leave a green or blue outline, especially around hair or shoulders. A high-quality free workflow aims to minimize spill by using tools that support “decontaminate colors,” feathering, or edge refinement, or by applying quick manual corrections afterward. Resolution also matters: some free services only provide low-resolution downloads unless you pay, which undermines the whole goal. If you need remove background high quality free for product photos or professional graphics, you should prioritize options that export at the original size or close to it. Finally, consistency matters when you process multiple images. If the tool performs well on one photo but fails on the next with similar lighting, it becomes hard to maintain a cohesive visual style. High quality means repeatable results, not just occasional success.
Choosing free tools that can remove background in high quality without hidden compromises
Not all free background removal tools are free in a practical sense. Some offer a limited number of downloads, apply watermarks, restrict resolution, or require account creation that slows down quick work. When evaluating options for remove background high quality free, look for clear terms: whether the output is watermark-free, whether commercial use is allowed, and whether the export keeps enough pixels for your intended use. For online listings, 1000–2026 pixels on the long side is often a comfortable minimum; for print, you may need more. Another consideration is format: PNG is standard for transparency, while WebP can be smaller and still support transparency if your platform accepts it. Some free tools also support “background replacement” with solid colors or templates, which can be helpful, but you should still ensure you can download a transparent version.
Quality also depends on the engine behind the tool. AI-based removers can be excellent for common subjects like people, pets, and products, but they vary in how they treat complex edges. For remove background high quality free, prioritize tools that let you refine the mask with a brush, even if the initial cutout is automatic. That hybrid workflow—automatic first pass, manual correction second—often produces the best outcome at no cost. Privacy is another factor: uploading images to a web service may be unacceptable for sensitive documents, internal prototypes, or private portraits. In those cases, offline-capable editors that can remove backgrounds locally are preferable, even if they require a slightly longer workflow. The best “free” choice is the one that matches your constraints: resolution needs, privacy requirements, speed, and the complexity of your images.
Getting better results by preparing your image before you remove background for free
Even the best free remover performs better when the input photo is prepared correctly. A clean subject-background separation is the biggest predictor of success. If you want remove background high quality free results, start with an image where the subject is well-lit and clearly distinguishable from the background. Backlighting can cause the subject edges to blend into bright areas, while low light introduces noise that confuses automatic selection. If you have control over the photo shoot, use a plain backdrop and keep the subject a few feet away from the background to reduce shadows. If you don’t control the source image, you can still improve it: adjust exposure slightly, increase contrast carefully, and reduce noise before removing the background. Many free editors on desktop and mobile offer these basic adjustments.
Resolution and compression are also crucial. Highly compressed JPEG images have blocky artifacts around edges, especially in hair and textured clothing. Those artifacts can be mistaken for background, leading to choppy cutouts. For remove background high quality free, try to use the original file from the camera or the highest-resolution version available. If you must work with a screenshot or a compressed image, consider upscaling with a free upscaler first, or at least applying mild sharpening after background removal to restore perceived detail. Cropping can help too: remove unnecessary empty areas so the tool focuses on the subject rather than processing irrelevant background. When you upload a tightly framed image, many removers detect the main subject more accurately. Lastly, consider the final use. If you plan to place the subject on a dark background, ensure the edges are clean and not semi-transparent in a way that reveals a faint light halo. Preparation reduces the amount of manual cleanup needed later.
Step-by-step workflow for “remove background high quality free” with reliable consistency
A repeatable workflow makes free background removal feel professional. Begin by selecting a tool that offers automatic removal plus manual refinement. Upload the image, run the automatic cutout, and immediately inspect edges at 200–300% zoom. For remove background high quality free outcomes, don’t judge only at a small preview size; halos and jagged edges appear when you zoom in. Next, refine the mask: use a restore brush to bring back missing details (like hair tips, fingers, or product handles) and an erase brush to remove leftover background patches. Pay special attention to interior holes—between arms and torso, between legs, within product frames—because automatic tools often miss these areas.
After the mask looks right, export to PNG or WebP with transparency. If the tool only exports a small size for free, consider a different tool or a two-step process: use a free remover that allows full resolution, or remove background locally in a free editor. Once exported, place the subject on a solid color layer (white, black, and a mid-gray) to spot issues. This quality check is essential for remove background high quality free because edges can look fine on a checkerboard but fail on real backgrounds. If you see a color fringe, use a spill suppression or “defringe” feature in a free editor, or lightly contract the selection by 1–2 pixels and feather it by 0.5–1 pixel. Finish by saving a master transparent file and separate copies optimized for web (compressed) and print (higher resolution). This approach keeps your best version intact while still delivering fast-loading images for online use.
Handling hair, fur, and fine edges when you remove background in high quality for free
Hair and fur are where many free tools struggle, but you can still achieve remove background high quality free results by combining smart selection and subtle edge refinement. Start with the best possible input: good lighting and minimal motion blur. If the original background is busy, automatic removers may misinterpret background texture as hair strands. After the initial cutout, zoom in around the hairline and identify two common problems: missing fine strands and leftover background between strands. Use a restore brush with a small, soft edge to bring back natural wisps. Then use an erase brush sparingly to remove obvious leftover patches. Over-erasing creates a helmet-like silhouette, so aim for realism rather than perfection at the pixel level.
Color contamination is another frequent issue. When hair is photographed against a green wall, grass, or bright sky, edge pixels pick up that color. For remove background high quality free, use any available “decontaminate” or “edge color correction” feature in your editor. If you don’t have one, a practical workaround is to place the cutout on the intended new background and add a very subtle inner shadow or a 1-pixel stroke that matches the subject’s natural edge tone. Another technique is to duplicate the cutout layer, blur the lower copy slightly, and clip it beneath the main layer to soften the transition—use restraint so it doesn’t look artificial. Finally, consider output size. Hair detail that looks imperfect at 400% zoom may be completely acceptable at the final display size on a product card or profile image. High quality is about believable edges in the real context, not necessarily flawless microscopic perfection.
Removing backgrounds for product photos: clean edges, true colors, and marketplace readiness
For e-commerce, the goal is often a pure white or transparent background with accurate product color. A remove background high quality free workflow for products should prioritize crisp edges, correct cutouts around reflective surfaces, and consistent shadows. Start by ensuring the product photo is evenly lit. Harsh shadows can either be cut off (making the product float unnaturally) or partially retained (looking messy). Many sellers prefer removing the background completely and then adding a subtle, consistent shadow later. If your remover keeps uneven shadow fragments, use the erase brush to remove them and recreate a cleaner shadow in a free editor with a soft ellipse and blur. This produces a controlled, professional look without paid software.
Expert Insight
Start with the best source image you can: use a high-resolution file, good lighting, and clear contrast between the subject and the background. Before removing the background, crop tightly around the subject and adjust exposure/contrast slightly so edges (hair, fur, product outlines) are easier to separate cleanly. If you’re looking for remove background high quality free, this is your best choice.
Use a free background remover, then refine the result for a high-quality finish: zoom in to check edges, erase leftover halos, and restore fine details with a soft brush around tricky areas. Export as PNG for transparency, and if you’re placing it on a new background, add a subtle shadow or edge feathering to blend naturally. If you’re looking for remove background high quality free, this is your best choice.
Reflective and transparent products—glass bottles, glossy packaging, clear plastic—are challenging because parts of the object may resemble the background. For remove background high quality free results, you may need to accept a semi-transparent edge in some areas. Look for tools that support partial transparency in the mask rather than a harsh binary cutout. If the free tool only produces a hard edge, you can soften it slightly with feathering and then increase contrast locally to keep the product shape. Also check for missing holes: handles, straps, or gaps in product frames. Many automatic removers fill these areas accidentally. A quick manual correction restores accuracy and helps your listing look trustworthy. Finally, export in the right size and format for your marketplace. PNG is common for transparency, but some platforms prefer JPG on white. If you need JPG, place the cutout on a pure white layer and export at high quality to avoid banding and edge artifacts.
Removing backgrounds for portraits and profile photos without losing realism
Portrait background removal is popular for resumes, team pages, speaker bios, and social profiles. The main risk is producing an unnatural cutout: sharp edges around shoulders, missing hair texture, or an overly smoothed face due to aggressive processing. For remove background high quality free portrait results, start by choosing a photo with clear separation between the subject and background. After automatic removal, focus on the neckline, ears, and hairline. These areas reveal quality instantly. Restore missing edges gently and avoid cutting into natural contours. If your tool offers a feather slider, use small values; too much feathering makes the subject look blurry against a crisp new background.
| Option | Quality | Cost | Best for |
|---|---|---|---|
| Automatic AI background remover (free) | High for clear subjects; may struggle with hair/transparent edges | Free (often with limits/watermark on some tools) | Fast, high-quality cutouts for product photos, portraits, and social media |
| Manual editing (free tools) | Highest when done carefully; precise edge control | Free | Complex images (hair, fur, intricate details) where you need pixel-perfect results |
| Hybrid workflow (AI + manual touch-up) | Best overall balance; clean edges with quick refinement | Free (using free AI + free editor) | When you want “high quality” results quickly without paying for pro software |
Another common issue is inconsistent lighting. If you place a cutout from a warm indoor photo onto a cool blue background, the subject can look pasted on. A high-quality free workflow includes quick color matching: adjust the subject’s white balance slightly to harmonize with the new backdrop. Many free editors allow basic temperature and tint changes. For remove background high quality free headshots, consider adding a subtle background gradient instead of a flat color, which can hide minor edge imperfections while still looking professional. If you’re creating a consistent team gallery, standardize the crop, head size, and background color across all images. Consistency often reads as “high quality” even more than perfect masking. Export at sufficient resolution for your platform—team pages often need at least 800×800 pixels, while speaker pages may require larger. Keeping a transparent master file lets you adapt the same cutout to different designs later.
Free editing techniques to polish the cutout after background removal
Background removal is only the first step; polishing makes the difference between “good” and “premium.” After you remove background high quality free, open the PNG in a free editor that supports layers (desktop or mobile). Place it on multiple test backgrounds to reveal edge issues. Then apply targeted fixes: use a soft eraser at low opacity to gently clean halos, and use a small brush to restore missing corners. If you see jagged edges, a tiny amount of feathering can help, but excessive blur reduces sharpness. A better approach is to slightly contract the selection (or shrink the mask) by 1 pixel and then apply minimal smoothing. This removes fringe without making the subject look fuzzy.
Shadows and grounding are another finishing touch. Cutouts often look like they’re floating, especially product images and full-body shots. For remove background high quality free outputs, add a subtle shadow that matches the light direction in the original image. Create a duplicate of the subject, fill it with black, blur it, reduce opacity, and offset it slightly. Keep it subtle; the goal is realism, not a dramatic effect. You can also add a soft ambient shadow beneath products using an ellipse shape. If color spill remains, try a “defringe” option if available, or manually paint along the edges on a new layer set to color blend mode, sampling a natural edge color from the subject. Finally, optimize file size for web use without ruining edges. Exporting PNG with too much compression can introduce artifacts; if WebP is available and supported by your platform, it can reduce size while maintaining transparency and quality.
Batch processing: how to remove background high quality free for multiple images efficiently
When you have dozens or hundreds of images—product catalogs, staff headshots, or social content—manual processing becomes time-consuming. A remove background high quality free batch strategy relies on consistency and smart grouping. Start by sorting images into similar categories: same lighting, same subject type, same background. Automatic removers perform more consistently within a uniform set. Then test a small sample from each group to see which tool handles it best. Some free tools excel at people, while others do better with objects. Once you choose a tool, run batch removal where possible, then schedule a quick quality-control pass. The goal is not to edit every pixel; it’s to catch the most visible errors—missing parts, leftover background blocks, and obvious halos.
To maintain high quality at scale, create a checklist for each image: check hair or complex edges, check interior cutouts, check for color fringe, and check final export size. For remove background high quality free workflows, saving presets helps. In your editor, keep a template file with standard backgrounds, shadow settings, and export dimensions. Drop each cutout into the template, align it, and export. This reduces repetitive setup time and makes your visuals consistent. If you need multiple formats (transparent PNG for design, white JPG for marketplaces, and compressed WebP for web), export them in a predictable naming scheme. Even with free tools, a structured pipeline can feel like an enterprise-grade process. The key is to accept that automation handles 80–90% of the work, while quick human review ensures the final 10–20% that makes the output look truly professional.
Common mistakes that lower quality when you remove background for free (and how to avoid them)
One frequent mistake is relying on low-resolution previews and assuming the result is clean. Many issues only appear when you zoom in or place the subject on a contrasting background. For remove background high quality free, always inspect edges closely and test on at least two solid colors. Another mistake is exporting to JPG when you need transparency. JPG removes transparency and can add compression artifacts at the edges, making the cutout look worse. If transparency is required, PNG or WebP is the better choice. If a platform requires JPG, place the subject on the final background color before exporting to avoid unwanted edge blending.
Over-smoothing is another quality killer. Some tools apply aggressive feathering or edge blur to hide imperfect selections, but it makes the subject look soft compared to the new background. For remove background high quality free, aim for controlled edge refinement: small feather values, minimal blur, and precise brush work where needed. Also watch for “halo” effects caused by leaving a thin ring of the original background. This happens often when the background is bright and the subject is dark. A quick fix is contracting the mask slightly or using a defringe tool. Finally, avoid inconsistent lighting and perspective when compositing. If you place a cutout into a scene with different light direction or color temperature, it will look fake even if the mask is perfect. A subtle color adjustment and shadow alignment can dramatically improve realism without costing anything.
Privacy, licensing, and safe use when you remove background high quality free
Free background removal can involve uploading images to third-party servers, and that raises privacy questions. If you’re processing personal photos, client work, or internal company materials, verify whether the service stores uploads, how long it retains them, and whether it uses them to train models. For remove background high quality free needs that involve sensitive content—IDs, contracts, medical images, or private family photos—consider offline tools that run locally. Even if local editing requires more steps, it gives you control over where the image data lives. Also consider account requirements. Some services require login via social accounts; if that’s a concern, choose a tool that allows guest processing or local editing instead.
Licensing is another overlooked part of “free.” Some tools are free for personal use but restrict commercial use. If you’re creating product listings, ads, or client deliverables, ensure the terms allow business usage. For remove background high quality free workflows, also consider the licensing of any replacement backgrounds, shadows, or templates you add afterward. Using a copyrighted stock background without permission can create legal risk even if the cutout itself is fine. Stick to royalty-free assets or create simple gradients and solid colors that you own. Finally, store a copy of your original image and your final exported cutout. If you ever need to prove ownership, redo the edit, or adjust for a new platform, having the source files and a transparent master saves time and avoids quality loss from repeated re-exports.
Final thoughts on achieving remove background high quality free results every time
Getting a professional cutout without paying is absolutely achievable, but it depends on combining the right tool with a repeatable process. Strong input images, careful edge inspection, and light refinements consistently outperform a one-click approach. When you treat background removal as a small workflow—prepare the image, run the automatic cutout, refine the mask, test on multiple backgrounds, and export in the correct format—you can meet the same standards expected in polished marketing materials and competitive online listings. The difference between an average cutout and a premium-looking one is usually just a few minutes of attention to hairlines, interior gaps, and color fringes. If you’re looking for remove background high quality free, this is your best choice.
If your goal is remove background high quality free output that looks clean on any platform, keep a transparent master file, standardize your export sizes, and build a quick quality-control habit before publishing. Over time, you’ll learn which photos are easy wins, which ones need manual help, and which ones are better re-shot with improved lighting and separation. With that practical approach, free background removal becomes a reliable skill rather than a gamble, and your visuals stay sharp, consistent, and ready for real-world use.
Watch the demonstration video
In this video, you’ll learn how to remove backgrounds from images for free while keeping high-quality results. It walks you through simple tools and step-by-step methods to create clean cutouts, refine edges, and export transparent PNGs—perfect for product photos, thumbnails, and social media graphics without paying for expensive software. If you’re looking for remove background high quality free, this is your best choice.
Summary
In summary, “remove background high quality free” is a crucial topic that deserves thoughtful consideration. We hope this article has provided you with a comprehensive understanding to help you make better decisions.
Frequently Asked Questions
How can I remove a background in high quality for free?
To **remove background high quality free**, choose a free background remover that lets you export at full resolution. Upload a crisp, high-resolution photo, fine-tune the cutout—especially around hair or semi-transparent edges—then download the result as a PNG to keep the image clean and sharp.
Will removing the background reduce image quality?
Yes—this can happen if the tool automatically downsizes your image or applies heavy compression. To **remove background high quality free**, look for export settings like “HD,” “original size,” or “no compression,” and save the result as a PNG to keep crisp, clean edges.
What’s the best free format to download after background removal?
PNG is best for high quality because it keeps transparency and avoids JPEG artifacts around edges.
How do I get clean edges around hair or fur for free?
To **remove background high quality free**, choose a tool that offers edge refinement (like hair, feather, or brush controls). Zoom in closely, bring back any missing strands along the edges, apply a light feather to the mask for a natural transition, and steer clear of aggressive smoothing that can blur fine details.
Can I remove backgrounds from images in bulk for free?
Some free tools offer limited batch processing, but if that’s not enough, try a free editor with mask and action support—or simply handle your images one at a time to keep every detail crisp. If your goal is to **remove background high quality free**, this approach helps you maintain full resolution and consistent results across your entire set.
Is it safe to upload photos to free background remover sites?
Before you upload any photo, review the tool’s privacy policy and data retention period, steer clear of sharing sensitive images, and choose services that delete files right after processing or support local/offline editing—especially if you want to **remove background high quality free** without compromising your privacy.
📢 Looking for more info about remove background high quality free? Follow Our Site for updates and tips!

Trusted External Sources
- A Free Tool for Quick Background Removal (No Sign-ups + … – Reddit
Nov 30, 2026 … 70 votes, 51 comments. Hey everyone, I just discovered remove-bg.io, and it’s honestly been a game-changer for cutting out image backgrounds in seconds. If you’ve been searching for a way to **remove background high quality free**, this tool is definitely worth checking out.
- Free Image Background Remover | Adobe Express
Adobe Express makes it quick and effortless to remove a background from any photo. Just upload your image to the Remove Background tool, and it will automatically cut out the subject in seconds—so you can create clean, professional-looking designs with **remove background high quality free** results.
- Any good, free ways to remove background noise while recording in …
Aug 11, 2026 … Works the same way as the OBS filter. Regardless though, your audio quality will degrade when you use any kind of filter or suppression. When … If you’re looking for remove background high quality free, this is your best choice.
- Remove Background from Image for Free – remove.bg
Meet your all-in-one AI background remover and generator. With remove.bg, you can **remove background high quality free** in seconds—cleanly cutting out people, products, and objects so your images look polished and ready for any project.
- Online Image Background Remover – Canva
Remove the background of your image in seconds and get a clean, professional result with **remove background high quality free**. Once you’re happy with your design, download it as a high-resolution PNG—quick, easy, and ready to use anywhere.