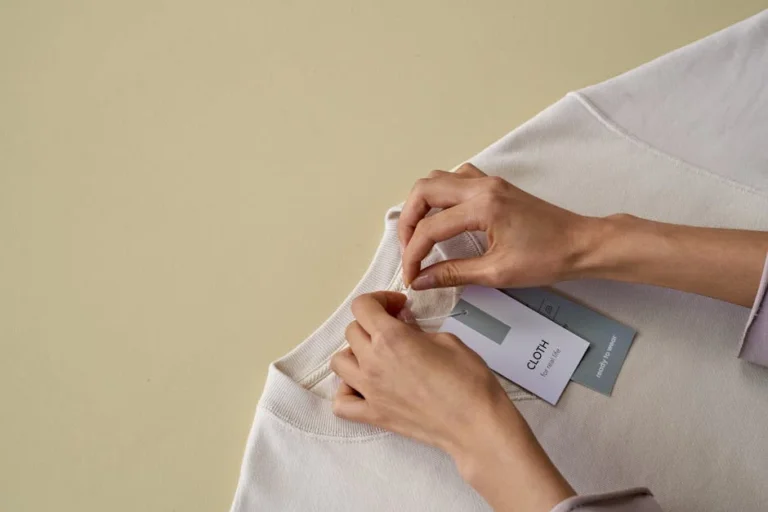
Searching for remove background hd quality usually signals a very specific goal: separating a subject from its original scene while keeping the edges crisp, the textures intact, and the final file suitable for professional use. The “HD quality” part matters because many background removal attempts look acceptable only at small sizes, then fall apart when used on a product page hero image, a billboard mockup, a print catalog, or a high-resolution marketplace listing. When people remove a background, they are not only deleting pixels behind the subject; they are rebuilding a believable boundary around hair, fabric fibers, glass, reflections, and semi-transparent elements. HD results depend on how cleanly the subject is segmented, how well fine details are preserved, and how accurately the new background integrates with the subject’s lighting and color.
Table of Contents
- My Personal Experience
- Understanding What “Remove Background HD Quality” Really Means
- Why HD-Quality Background Removal Matters for Branding and Sales
- How Image Resolution and File Format Affect Background Removal Results
- Choosing the Right Tool: AI Background Removers vs. Manual Editing
- Preparing the Image for Cleaner HD Background Removal
- Edge Refinement Techniques for Hair, Fur, and Soft Details
- Handling Transparent and Reflective Objects Without Losing Realism
- Expert Insight
- Maintaining Natural Shadows and Depth After Background Removal
- Optimizing for Web: Speed, Sharpness, and Transparency
- Optimizing for Print and High-DPI Displays
- Common Mistakes That Reduce HD Quality (and How to Avoid Them)
- Workflow Tips for Consistent Results at Scale
- Final Thoughts on Achieving “Remove Background HD Quality” Without Compromise
- Watch the demonstration video
- Frequently Asked Questions
- Trusted External Sources
My Personal Experience
I recently needed to remove the background from a set of product photos for my online shop, but I didn’t want that cut-out, low-res look that makes everything seem cheap. The first time I tried, the edges around the hair and glass items came out jagged, and when I exported the file, the “HD” version still looked blurry once I placed it on a white banner. I ended up redoing the edits with a higher-resolution source image, zooming in to refine the mask, and exporting as a PNG at full size instead of compressing it. The difference was obvious—cleaner outlines, no weird halos, and the image stayed sharp even after resizing for the website. It took a bit longer than I expected, but it finally looked like a professional background removal in HD quality. If you’re looking for remove background hd quality, this is your best choice.
Understanding What “Remove Background HD Quality” Really Means
Searching for remove background hd quality usually signals a very specific goal: separating a subject from its original scene while keeping the edges crisp, the textures intact, and the final file suitable for professional use. The “HD quality” part matters because many background removal attempts look acceptable only at small sizes, then fall apart when used on a product page hero image, a billboard mockup, a print catalog, or a high-resolution marketplace listing. When people remove a background, they are not only deleting pixels behind the subject; they are rebuilding a believable boundary around hair, fabric fibers, glass, reflections, and semi-transparent elements. HD results depend on how cleanly the subject is segmented, how well fine details are preserved, and how accurately the new background integrates with the subject’s lighting and color.

HD background removal is also influenced by how the image was captured. A well-exposed photo with minimal motion blur and a clear separation between subject and background makes it easier to remove background hd quality without harsh cutouts. Conversely, low light noise, heavy compression artifacts, and a background that shares the same color as the subject creates ambiguity at the edges. “HD” is not only about resolution; it’s also about preserving micro-contrast, avoiding halos, preventing jagged edges, and keeping natural transitions for soft boundaries like hair or fur. A high-quality cutout should still look like a real photograph even after the original environment is gone. That means handling anti-aliasing properly, maintaining realistic edge softness, and retaining subtle shadowing cues where appropriate. When these factors are handled thoughtfully, the extracted subject remains believable across web, mobile, and print outputs.
Why HD-Quality Background Removal Matters for Branding and Sales
When a brand relies on imagery to sell products or communicate trust, the difference between a quick cutout and remove background hd quality is immediately visible. On ecommerce platforms, shoppers judge quality in seconds, and inconsistent or low-grade backgrounds can make products look cheaper than they are. A clean, high-resolution cutout allows consistent presentation across categories, improves perceived professionalism, and supports a unified visual identity. HD extraction is especially important for glossy items, metallic surfaces, and anything with fine edges—think jewelry, eyewear, cosmetics packaging, or electronics—where sloppy masking creates distracting halos and rough outlines. Those artifacts reduce clarity and can even trigger platform rejection if images fail marketplace guidelines.
For marketing teams, HD background removal supports flexible repurposing. A single well-prepared subject can be placed into multiple layouts: banners, social ads, newsletters, seasonal campaigns, and landing pages. If the cutout is high quality, it can be enlarged and cropped without revealing pixelation or edge defects. That means fewer reshoots and less time spent rebuilding assets for each channel. Designers also benefit because a properly isolated subject behaves predictably in composition; it can be layered over gradients, textures, or lifestyle scenes without needing constant patchwork fixes. The time saved is significant, but the bigger gain is consistency: a brand that repeatedly uses clean, high-resolution cutouts develops a recognizable polish that builds confidence. HD removal also helps with accessibility and clarity, ensuring that product silhouettes remain readable even on small screens, while still holding up on retina displays and high-DPI monitors. If you’re looking for remove background hd quality, this is your best choice.
How Image Resolution and File Format Affect Background Removal Results
To achieve remove background hd quality, resolution is the foundation, but file format is the framework that preserves the work. A high-resolution source image gives the masking process more information at the edge: more pixels to describe strands of hair, lace patterns, or subtle blur transitions. If the source is only 800 pixels wide and heavily compressed, no tool can invent missing detail without introducing artifacts. That’s why professional workflows prioritize the largest available original—preferably RAW or a high-quality JPEG exported with minimal compression. The more intact the pixel data, the smoother the final edges and the more natural the extracted subject will appear against new backgrounds.
File format determines whether the result can be used cleanly across platforms. PNG is a common choice because it supports transparency and preserves edges well for web use, but it can produce large file sizes. WebP also supports transparency and often compresses better, making it a strong option for modern websites, though compatibility should be checked for older systems. For print or advanced compositing, TIFF or PSD formats preserve layers, masks, and high bit depth, allowing further refinement without repeated compression. Another key factor is color space: sRGB is typical for web, while Adobe RGB or CMYK workflows may be needed for print. If color management is ignored, the subject may appear dull or shifted after extraction. HD-quality removal is not only the mask; it’s the full chain from capture to export, ensuring the cutout remains sharp, color-accurate, and ready for its intended use. If you’re looking for remove background hd quality, this is your best choice.
Choosing the Right Tool: AI Background Removers vs. Manual Editing
Many people turn to AI tools first because they promise one-click remove background hd quality. AI-based removers can be excellent for simple subjects with clear separation, such as a person against a plain wall or a product against a studio backdrop. The best AI tools detect edges, preserve some fine detail, and output a transparent PNG quickly. For high-volume workflows—like processing hundreds of SKU images—AI can cut production time dramatically. However, AI output varies depending on lighting, background complexity, and the subject’s texture. Hair, transparent objects, and reflective surfaces are common failure points, where AI may either erase important details or leave background remnants.
Manual editing remains the gold standard for critical images where HD quality must be flawless. Techniques like pen tool paths for hard edges, channel masking for hair, and refined selections for soft transitions provide control that AI still struggles to match consistently. Manual workflows also allow selective decisions: keeping natural shadow under a shoe, preserving semi-transparent veil fabric, or adjusting edge softness to fit a new background. Many professionals use a hybrid approach: run AI to generate a first-pass mask, then refine manually in Photoshop, Affinity Photo, or similar software. This combination can deliver speed without sacrificing quality. The right choice depends on the final usage: if the image will be small on a listing page, AI may be sufficient; if it will be used in a hero banner or printed material, manual refinement is often necessary to truly remove background hd quality without visible artifacts.
Preparing the Image for Cleaner HD Background Removal
Preparation is a major factor in achieving remove background hd quality because the cleaner the input, the cleaner the extraction. Start by assessing exposure and contrast. If the subject blends into the background, increase separation before masking by adjusting levels or curves on a duplicate layer. Be careful not to crush shadows or blow highlights; the goal is to make edges readable, not to change the product’s true appearance. Noise reduction can help if the image was shot in low light, because noise creates speckled boundaries that confuse selection tools. At the same time, aggressive noise reduction can smear fine textures, so apply it selectively and at a moderate strength. If the image is a compressed JPEG with visible block artifacts, consider re-exporting from the original source if possible, because artifacts at the edge often become “stair steps” after background removal.
Color spill is another common issue. A green screen or colored background can cast tint onto the subject’s edges, especially around hair and glossy surfaces. If you remove the background without addressing spill, the subject may retain a green or blue fringe that becomes obvious on white or dark backgrounds. A good preparation step is to neutralize edge color contamination using decontamination tools, selective hue adjustments, or manual painting on the mask boundary. Also consider sharpening: applying sharpening before masking can create halos that are hard to remove, so it’s usually better to mask first and then sharpen the final composite for the output size. For product photos, cleaning dust and scratches before extraction prevents distracting specks from floating on transparency. These steps may feel meticulous, but they significantly improve the final cutout. When preparation is done correctly, the actual removal process becomes smoother, faster, and more likely to deliver true HD-quality edges. If you’re looking for remove background hd quality, this is your best choice.
Edge Refinement Techniques for Hair, Fur, and Soft Details
Hair and fur are where “good enough” cutouts fail and remove background hd quality becomes a real craft. The challenge is that hair is not a solid boundary; it’s a mix of opaque strands, semi-transparent wisps, motion blur, and background showing through gaps. A hard selection will make hair look like a helmet. The best approach often combines multiple techniques: start with a broad selection to isolate the main shape, then refine the perimeter using edge-aware tools. In Photoshop, Select and Mask can help, especially when used with the Refine Edge Brush around flyaways. For more control, channel-based masking can be superior, because it leverages contrast between subject and background in individual color channels. By amplifying contrast in the most distinct channel, you can isolate fine strands with less guesswork.
After the initial mask, edge refinement often requires manual touch-ups. Painting on the mask with a soft brush at low opacity can restore natural transitions. For areas where the background shows through hair, consider whether that transparency should remain; if the new background is drastically different, you may need to rebuild hair detail with subtle painting or by preserving partial transparency. Color decontamination is also essential: even a perfect mask can look wrong if the hair edge retains the old background hue. Use edge color correction techniques to neutralize fringing, but avoid overdoing it, as excessive decontamination can create gray or muddy edges. Another advanced method is to create a “edge blend” layer: duplicate the subject, apply a slight blur to the mask edge, and reduce opacity to soften harsh transitions without losing sharpness in the core. The goal is realism at 100% zoom, not just a clean silhouette. When hair and soft details are handled properly, the cutout looks natural on any background and truly qualifies as HD-quality removal. If you’re looking for remove background hd quality, this is your best choice.
Handling Transparent and Reflective Objects Without Losing Realism
Transparent and reflective objects are among the hardest cases for remove background hd quality because the background is part of what makes the object look real. Glass, plastic packaging, sunglasses lenses, and bottles often contain reflections and refractions of the original environment. If you remove the background too aggressively, the object can look flat, fake, or oddly tinted. The key is to separate what should become transparent from what should remain as highlights and reflections. Instead of aiming for a single “perfect cutout,” professionals often build layered masks: one for the solid parts, one for semi-transparent regions, and one for specular highlights. This layered approach allows you to preserve realism while still enabling background changes.
Expert Insight
Start with the highest-resolution source available and keep the subject edges crisp: zoom to 200–300% while refining the selection, feather by 0.5–1 px, and apply a slight edge shift inward to prevent halos. If hair or fine details are present, use a dedicated refine-edge tool and sample the background color to decontaminate fringes. If you’re looking for remove background hd quality, this is your best choice.
Export with settings that preserve HD quality: choose PNG for transparency, keep the original pixel dimensions, and avoid re-saving multiple times. If the cutout will be placed on a new background, match lighting and add a subtle shadow to blend naturally without softening the subject. If you’re looking for remove background hd quality, this is your best choice.
For glassware, consider keeping subtle edge shadows and highlights that define shape. If the new background is lighter or darker than the original, you may need to adjust the intensity of reflections so the object still reads correctly. Sometimes the best result is achieved by compositing: place the object on the new background, then reintroduce certain highlights from the original photo using blending modes like Screen or Linear Dodge, masked carefully to avoid bringing back unwanted background. For clear plastic, edge fringing can be severe; refine the mask with partial transparency rather than trying to force a hard boundary. Also watch for color casts: a bottle photographed against a warm backdrop can inherit that warmth in its reflections, and it may clash on a cool white background. Selective color adjustments on the reflection layer can correct this without destroying the natural look. Achieving HD-quality removal for transparent objects is less about “erasing” and more about intelligent reconstruction, preserving the cues the eye uses to interpret material and depth. If you’re looking for remove background hd quality, this is your best choice.
Maintaining Natural Shadows and Depth After Background Removal
A common reason cutouts look amateurish is that the subject appears to float. To remove background hd quality while keeping realism, shadows must be handled thoughtfully. Shadows provide grounding, scale, and direction of light. In product photography, a soft contact shadow under the object can make it feel anchored even on a pure white background. When removing the background, decide whether to keep the original shadow, recreate it, or combine both. If the original shadow is clean and neutral, it can sometimes be retained by separating it into its own layer and adjusting opacity. If the shadow contains background textures or color spill, recreating it may be better: use a soft brush or an elliptical shape, blur it, and transform it to match the perspective. Then adjust opacity until it looks natural rather than theatrical.
| Option | HD Background Removal Quality | Best For |
|---|---|---|
| AI Auto Remove (HD) | Clean edges with strong subject detection; preserves fine details like hair in most photos | Fast, high-quality cutouts for product photos, portraits, and social content |
| Manual Refinement (Brush/Erase) | Highest control for tricky areas; can perfect halos, hair strands, and transparent objects | Complex subjects (fur, lace, glass) and professional-grade results |
| Batch Remove (HD Export) | Consistent results across many images; quality depends on source resolution and lighting | E-commerce catalogs, bulk listings, and workflow automation |
Depth cues also include ambient occlusion, subtle gradients around contact points, and edge softness that matches the camera’s focus. If the original photo has shallow depth of field, the edges of the subject may naturally blur in certain areas. A perfectly sharp mask everywhere can look unnatural. HD quality doesn’t mean “hard edge”; it means “correct edge.” For portraits, the shoulders or hair tips might be slightly out of focus and should remain so in the cutout. For products, the far edge might be softer depending on lens and aperture. Matching these details helps the subject blend into new scenes seamlessly. Another consideration is background color influence: a subject photographed against a dark background may have brighter edge highlights, while a subject shot against white may have darker edge definition. When compositing onto a new background, minor adjustments to contrast along the edge can improve integration. Preserving or recreating shadows and depth ensures the final image looks professionally composited rather than simply pasted, which is the hallmark of true HD-quality background removal. If you’re looking for remove background hd quality, this is your best choice.
Optimizing for Web: Speed, Sharpness, and Transparency
For websites, achieving remove background hd quality is only half the job; the other half is delivering that quality quickly. Large transparent PNGs can slow down pages, especially on mobile connections. The best workflow balances clarity with performance: export at the maximum size needed for the design, not at the full camera resolution if it won’t be displayed that large. Use responsive images where possible, providing multiple sizes so browsers can choose the most appropriate file. WebP with transparency often yields smaller files than PNG while maintaining sharp edges, making it a strong choice for modern ecommerce and landing pages. If PNG is required, compress with a lossless optimizer to remove unnecessary metadata and reduce file size without degrading edges.
Sharpness should be tuned to the final display size. Over-sharpening creates halos around the subject, which are especially visible on transparent edges. A better approach is to apply mild sharpening after resizing, focusing on the subject’s interior details rather than the edge. Also consider background color variations on the site: if the cutout will be used on both light and dark sections, test it against multiple backgrounds to ensure no fringing remains. If you see a thin light outline on dark backgrounds, the mask may contain leftover matte pixels from the original scene; remove or neutralize them with edge correction or by contracting the mask slightly and feathering minimally. Transparency handling is another important point: some platforms render semi-transparent pixels differently, and a mask that looks fine in one browser can look slightly off in another. Preview across devices, especially for hair and soft edges. Web optimization doesn’t mean sacrificing quality; it means delivering HD-level clarity in a format and size that loads fast and looks consistent everywhere. If you’re looking for remove background hd quality, this is your best choice.
Optimizing for Print and High-DPI Displays
Print and high-DPI screens demand a stricter standard for remove background hd quality because viewers can see more detail and imperfections. On a retina display or a printed brochure, jagged edges, incomplete masking, and color fringing become obvious. For print workflows, start with the highest-resolution source available and keep edits non-destructive whenever possible. Work in 16-bit when needed to preserve smooth gradients and avoid banding, especially in areas like skin tones or soft shadows. If the final output is CMYK, convert carefully and check how edge colors shift; an edge that looks neutral in RGB can pick up a tint after conversion. Maintaining clean masks in layered formats like PSD or TIFF helps preserve flexibility for last-minute adjustments, which are common in print production.
Another consideration is effective resolution at final size. If the subject will be placed large on a poster, ensure the extracted subject has enough pixel data to support that scale. Upscaling after removal can magnify edge artifacts and make the cutout look artificial. If upscaling is unavoidable, do it before final edge refinement so the mask can be adjusted at the new resolution. For high-DPI screens, subtle issues like matte contamination and micro-halos are more visible; refine edges at 100% and 200% zoom, and test against backgrounds similar to the final design. For print, incorporate realistic shadows and ensure that any semi-transparent areas—like fabric veils or glass—remain believable. Print also has different expectations for sharpness; what looks crisp on screen may print slightly softer, so controlled sharpening after compositing can help, but avoid sharpening the transparency boundary too aggressively. A print-ready cutout is a premium asset: once created properly, it can be reused across campaigns without rework, making the initial effort worthwhile. If you’re looking for remove background hd quality, this is your best choice.
Common Mistakes That Reduce HD Quality (and How to Avoid Them)
Several recurring mistakes prevent people from achieving remove background hd quality, even when using good tools. One of the biggest is relying on a single automatic selection without checking edges closely. At thumbnail size, the cutout may look fine, but at full resolution you may find jagged pixels, missing details, or leftover background patches. Another mistake is over-feathering the mask to hide imperfections. Too much feathering makes the subject look blurry and disconnected, especially on sharp product images. A better solution is targeted refinement: keep hard edges crisp where they should be crisp (like metal or packaging) and allow softness only where it exists naturally (like hair or motion blur). Also common is “haloing,” where a light or dark outline remains because the original background’s edge pixels are still present. This often happens when the background was bright and the subject is placed on a darker background later.
Compression and repeated exporting can also degrade quality. Each time a JPEG is re-saved, edge detail can deteriorate, producing artifacts that become more noticeable on transparent boundaries. Keeping a master file in PSD/TIFF and exporting final assets as needed helps maintain quality. Another pitfall is ignoring color spill and edge tint; even with a perfect mask shape, a green fringe from a chroma background will betray the edit. Use spill suppression or manual color correction along the edges. For portraits, removing too much around hairline areas can create an unnatural “cut” look; it’s better to preserve a few flyaways and keep partial transparency where appropriate. For products, failing to recreate grounding shadows makes items float, reducing realism. Finally, inconsistent lighting when compositing onto a new background can make the subject look pasted; adjust brightness, contrast, and color temperature so the subject matches the scene. Avoiding these mistakes is less about learning every tool and more about adopting a quality-control mindset: zoom in, test on multiple backgrounds, and verify that the cutout holds up at the largest intended size. If you’re looking for remove background hd quality, this is your best choice.
Workflow Tips for Consistent Results at Scale
When background removal becomes a repeatable task—such as for catalogs, marketplaces, or content libraries—consistency becomes as important as remove background hd quality. A scalable workflow starts with standards: define target dimensions, background requirements (transparent, white, or specific color), shadow style, and file formats for each channel. Then create templates and presets for exporting, naming, and compression. For teams, consistency also means documenting how edges are handled for different categories: apparel may require softer transitions and attention to fabric fraying, while electronics need crisp lines and careful handling of reflections. By setting category-specific rules, you reduce subjective decisions and prevent mismatched results across a product grid.
Batch tools and automation help, but they should be paired with human review. AI removers can generate first-pass masks in bulk, after which a retoucher can focus on exceptions: hair, transparent parts, complex shapes, or images with poor contrast. Maintain a checklist for QC: inspect edges at 100%, check for halos on both light and dark backgrounds, verify no missing parts (like watch straps or thin cords), and ensure the subject is centered and aligned consistently. Use a master layered file for each hero asset that may be reused in campaigns, and export derivatives for specific uses. Also consider version control: keep track of edits so improvements can be applied without starting over. For web teams, coordinate with developers on preferred formats (WebP, PNG), maximum file sizes, and responsive image requirements. A disciplined workflow ensures that every image not only meets the HD-quality standard but also matches the brand’s visual system, making the entire library look intentional and professional rather than pieced together over time. If you’re looking for remove background hd quality, this is your best choice.
Final Thoughts on Achieving “Remove Background HD Quality” Without Compromise
Reaching true remove background hd quality comes down to respecting details: starting with a strong source image, choosing the right tool for the subject, refining edges with care, and exporting in formats that preserve transparency and sharpness. The most convincing results rarely come from a single click alone; they come from understanding where automation works and where manual control is needed, especially for hair, transparency, reflections, and realistic shadows. When the subject’s boundary looks natural at full resolution, when there is no visible fringing on different backgrounds, and when the final file loads efficiently without sacrificing clarity, the cutout becomes a reliable asset that can be reused across web, social, ads, and print.
Quality is also a consistency habit: zooming in, testing on multiple backgrounds, and keeping a non-destructive master file prevents small flaws from becoming big problems later. Whether the goal is cleaner ecommerce listings, polished brand visuals, or flexible creative production, the difference between a basic cutout and remove background hd quality is the difference between an image that merely “works” and an image that sells, communicates, and scales confidently across every channel.
Watch the demonstration video
In this video, you’ll learn how to remove a background in HD quality while keeping your subject sharp and clean. It walks through simple steps to create smooth cutouts, refine edges like hair and clothing, and export high-resolution results for photos, thumbnails, and social media without losing detail. If you’re looking for remove background hd quality, this is your best choice.
Summary
In summary, “remove background hd quality” is a crucial topic that deserves thoughtful consideration. We hope this article has provided you with a comprehensive understanding to help you make better decisions.
Frequently Asked Questions
How can I remove a background in HD quality without losing sharpness?
To **remove background hd quality**, start by using an AI background remover or precise selection tools, then export your image at its original resolution (or higher) while avoiding heavy compression. Finish by refining the edges and adding a slight feather to keep the cutout clean and prevent unwanted halos.
What file format should I use to keep HD quality after background removal?
For the best results, choose PNG or TIFF to keep transparency intact and maintain crisp details—especially if you want to **remove background hd quality** without losing sharp edges. Reserve JPEG for situations where transparency isn’t needed and a bit of compression (and quality loss) is acceptable.
Why do my cutout edges look jagged or blurry in HD?
This issue usually happens when you’re working with a low-resolution image, heavy smoothing, or inaccurate edge detection that blurs fine details. To fix it and **remove background hd quality**, refine your mask carefully, tweak feathering and contrast to sharpen the edges, and start with a higher-resolution source whenever possible.
Can I remove the background from a 4K image and keep it 4K?
Absolutely—begin with the original 4K file and export it at the exact same pixel dimensions. To **remove background hd quality**, double-check that the tool keeps the resolution intact and doesn’t automatically downscale the image during processing or export.
How do I avoid white/black halos around the subject after removing the background?
To get a clean, professional cutout, use **Decontaminate Colors** (or a similar tool), then refine the edge with a subtle feather and remove any fringe or leftover matte. Make sure your selection captures fine details like individual hairs and semi-transparent edges—this is key if you want to **remove background hd quality** without losing realism.
What’s the best background to place behind an HD cutout for a natural look?
To make your composite look seamless, match the lighting direction, color temperature, and depth of field between the subject and the new scene. After you **remove background hd quality**, add a soft, natural shadow and a touch of subtle noise or grain so the subject blends realistically into the final image.
📢 Looking for more info about remove background hd quality? Follow Our Site for updates and tips!

Trusted External Sources
- A Free Tool for Quick Background Removal (No Sign-ups + … – Reddit
Nov 30, 2026 … HD downloads are free—no quality loss at all. You can edit the cutout by restoring or removing parts of the original image. Add shadow and … If you’re looking for remove background hd quality, this is your best choice.
- Remove Background from Image for Free – remove.bg
Remove image backgrounds automatically in just 5 seconds with a single click—no more wasting hours manually selecting pixels. Upload your photo now and get a clean cutout with **remove background hd quality** results in seconds.
- Free Image Background Remover | Adobe Express
Remove backgrounds from your images online in seconds with our free, easy-to-use background eraser. Powered by professional-grade, intuitive tools, it helps you remove background hd quality results—perfect for product photos, portraits, and social posts—without any design experience required.
- AI Background Remover – Free, Instant & HD | ImagineArt
Remove backgrounds instantly with AI. ImagineArt’s background remover makes it easy to **remove background hd quality** in just seconds—simply upload any photo, let the AI do the work, and download a clean, professional-looking cutout ready for any project.
- FREE HD Background Remover – Remove Bg Online – Craiyon
To get started, click **“Import an image,”** paste with **CTRL+V**, or simply drag and drop your file into the editor. If you’re using a Craiyon image, just hit **“Remove background”** to **remove background hd quality** in one click.