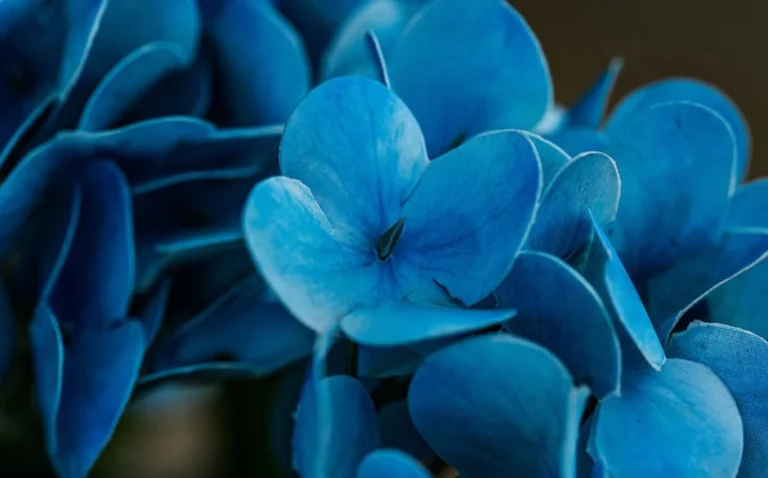
Finding a reliable photo enhancer free solution can feel like striking a balance between convenience and quality. Most people take photos constantly—products for a small shop, family snapshots, social media posts, profile pictures, event invites, and quick images for messaging. The problem is that real-life conditions rarely match ideal studio lighting. Indoor shots can look yellow or muddy, outdoor photos can blow out highlights, and phone cameras can soften details when light is low. A free photo enhancer helps correct those issues quickly without needing a paid subscription or advanced editing skills, which is especially valuable when you’re improving a large batch of images or working on a tight timeline. Instead of living with dull colors, visible noise, or washed-out contrast, you can recover a more natural look and make the photo feel closer to what you saw with your eyes.
Table of Contents
- My Personal Experience
- Why a Photo Enhancer Free Tool Matters for Everyday Images
- Core Features to Look for in a Photo Enhancer Free Platform
- How Automatic Enhancement Works and When to Use It
- Manual Enhancements That Make the Biggest Visual Difference
- Improving Low-Light and Noisy Photos Without Losing Detail
- Enhancing Portraits: Natural Skin Tones, Sharp Eyes, and Balanced Light
- Product Photos and E-Commerce Listings: Clarity, Color Accuracy, and Trust
- Expert Insight
- Restoring Old or Scanned Photos with Free Enhancement Tools
- Mobile vs Desktop: Choosing the Right Free Photo Enhancer for Your Workflow
- Privacy, Watermarks, and File Quality: What “Free” Really Means
- Practical Step-by-Step Workflow for Better Results Every Time
- Common Mistakes That Make Enhanced Photos Look Fake
- Final Thoughts on Choosing a Photo Enhancer Free Option That Delivers
- Watch the demonstration video
- Frequently Asked Questions
- Trusted External Sources
My Personal Experience
I was putting together a small photo album for my mom and realized most of the pictures on my phone were a little dark and grainy, especially the ones taken indoors. I didn’t want to pay for another subscription, so I searched for a photo enhancer free option and tried a couple of tools until I found one that didn’t plaster a watermark on everything. I uploaded a few shots, nudged the brightness and sharpness, and used the auto-enhance once or twice—nothing dramatic, just enough to make faces clearer and colors look normal again. It won’t magically fix a totally blurry photo, but for quick touch-ups it saved me time and money, and the prints actually came out looking like the moments I remember.
Why a Photo Enhancer Free Tool Matters for Everyday Images
Finding a reliable photo enhancer free solution can feel like striking a balance between convenience and quality. Most people take photos constantly—products for a small shop, family snapshots, social media posts, profile pictures, event invites, and quick images for messaging. The problem is that real-life conditions rarely match ideal studio lighting. Indoor shots can look yellow or muddy, outdoor photos can blow out highlights, and phone cameras can soften details when light is low. A free photo enhancer helps correct those issues quickly without needing a paid subscription or advanced editing skills, which is especially valuable when you’re improving a large batch of images or working on a tight timeline. Instead of living with dull colors, visible noise, or washed-out contrast, you can recover a more natural look and make the photo feel closer to what you saw with your eyes.

Another reason a free enhancer matters is consistency. If you post regularly or maintain a brand presence, inconsistent image quality can undermine trust. A café menu photo that looks grainy next to a crisp latte shot, or a marketplace listing image that appears dark and blurry, can reduce engagement. A no-cost enhancer can raise the baseline quality of your visuals so your feed, catalog, or portfolio feels coherent. The best outcomes come from understanding what “enhancement” actually does: it typically adjusts exposure, contrast, highlights, shadows, white balance, saturation, sharpness, and sometimes applies AI-based denoising or deblurring. When used carefully, those changes preserve authenticity while making details easier to see. When used aggressively, enhancement can create halos, plastic skin, or unnatural colors—so the goal is subtle improvement, not an artificial makeover. If you’re looking for photo enhancer free, this is your best choice.
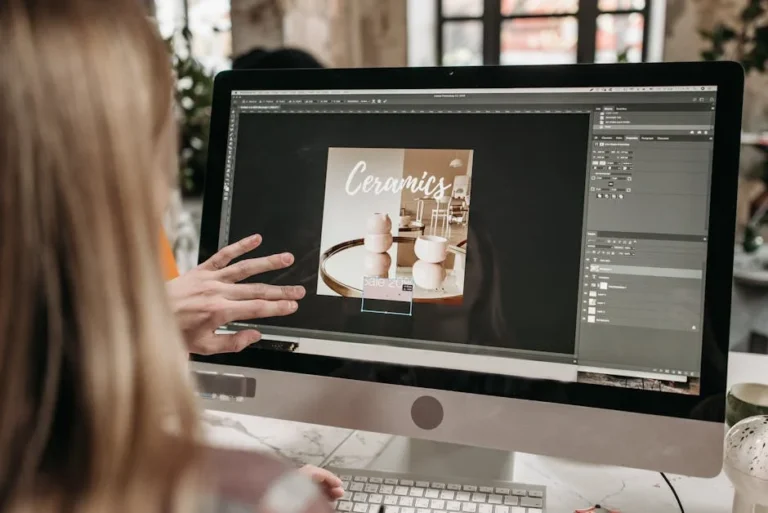
Core Features to Look for in a Photo Enhancer Free Platform
A strong photo enhancer free option usually offers a combination of automatic improvements and manual controls. Auto enhancement is useful when you need fast results: one click can correct exposure, boost clarity, and balance color. Manual controls are essential when the photo is close to perfect but needs targeted help—like reducing highlights on a bright sky while lifting shadows on a subject’s face. Look for sliders that handle brightness, contrast, white balance temperature/tint, saturation/vibrance, sharpness, and noise reduction. If the tool provides separate highlight and shadow controls, you can rescue images that would otherwise look flat after a basic brightness increase. A histogram or preview comparison (before/after) can also help you avoid over-editing.
AI features can be helpful, but they should be transparent and adjustable. Some free enhancers include “AI sharpen,” “AI denoise,” or “AI deblur.” These can improve low-light phone photos or older images, but the best tools allow you to dial back the strength so skin doesn’t look waxy and textures don’t become crunchy. Batch processing is another high-value feature when you need to enhance multiple photos with similar lighting, such as product photos shot on the same background. Export options matter as well: choose tools that let you save in common formats (JPG, PNG, sometimes WebP) and allow you to control compression quality. If you need print-ready images, check whether the tool supports higher-resolution exports without forcing a watermark. Even for free use, a clean workflow—upload, enhance, preview, download—can save time and reduce frustration. If you’re looking for photo enhancer free, this is your best choice.
How Automatic Enhancement Works and When to Use It
Many people choose a photo enhancer free tool because automatic enhancement feels effortless. Behind that one-click button is usually a set of algorithms (and sometimes AI models) that analyze the image and apply adjustments based on common photographic patterns. For example, if the image is underexposed, auto enhancement may lift midtones and shadows while protecting highlights. If colors look dull, it may increase vibrance rather than saturation to avoid oversaturating already-strong colors. If the image looks soft, it may apply sharpening or local contrast (often called clarity). Some tools detect faces and prioritize skin tones or brighten facial areas slightly to make portraits more pleasing. These automatic corrections can be surprisingly effective for quick improvements, especially for casual photos or user-generated content.
Auto enhancement is most appropriate when you have a decent photo that needs general polishing rather than surgical fixes. Think of images that are slightly dark, a little flat, or mildly hazy. It’s also ideal when you’re enhancing images for messaging, social posting, or basic listings where speed matters. However, automatic results can struggle with challenging scenes: strong backlighting, mixed lighting (warm indoor bulbs plus daylight), heavy noise, or images with very bright elements like neon signs. In those cases, auto can push contrast too far, clip highlights, or shift white balance incorrectly. A smart workflow is to start with auto, then adjust manually to refine. If auto sharpening creates halos around edges, reduce sharpness. If auto increases saturation too much, pull it back and focus on white balance and contrast. The best free enhancers make auto a starting point, not a final answer. If you’re looking for photo enhancer free, this is your best choice.
Manual Enhancements That Make the Biggest Visual Difference
Even with a photo enhancer free tool, manual tweaks often deliver the most natural-looking improvements. The biggest win typically comes from exposure and white balance. If the photo is too dark, raising brightness alone can make it look gray and noisy; instead, increase exposure moderately, then lift shadows slightly and reduce highlights if needed. White balance is equally important because it affects how “clean” an image feels. A photo taken under warm indoor lights can look overly yellow; cooling the temperature a bit and adjusting tint can make whites look white again, which also improves skin tones and product colors. Once exposure and white balance are in place, contrast can add depth, but it’s easy to overdo. A small contrast increase combined with a gentle clarity adjustment can create crispness without making the image harsh.
Sharpness and noise reduction should be treated as a pair. If you sharpen a noisy image, you amplify grain and color speckles. A better approach is to apply light denoising first, then add sharpening only until details look defined. Many free tools provide a single “noise reduction” slider; use it sparingly to avoid smearing textures like hair, fabric, or foliage. Color adjustments should also be subtle. Vibrance is usually safer than saturation because it boosts weaker colors more than strong ones, preserving natural skin tones. If your tool includes HSL controls (hue, saturation, luminance per color), you can fix common issues like overly orange skin (reduce orange saturation slightly) or dull greens (increase green luminance for a fresher look). These manual steps don’t require professional training; they require restraint and a consistent method, which a good free enhancer makes accessible. If you’re looking for photo enhancer free, this is your best choice.
Improving Low-Light and Noisy Photos Without Losing Detail
Low-light images are where a photo enhancer free tool can either shine or disappoint. Phone cameras often increase ISO in dim conditions, creating noise and softening details. When you brighten a dark photo, that noise becomes more visible, especially in shadows and solid color areas like walls or skies. A high-quality enhancer uses denoising that reduces grain while preserving edges, but even basic tools can help if you use them carefully. Start by lifting exposure conservatively. Then raise shadows only as much as needed to reveal the subject. If the image has a strong light source (a lamp, a streetlight, a window), reduce highlights so the bright areas don’t blow out. After that, apply noise reduction gradually until the grain is less distracting. If your tool offers color noise reduction separately, prioritize that first because color speckles look more artificial than monochrome grain.
After denoising, sharpening becomes crucial, but it should be gentle. Oversharpening creates crunchy edges and can bring back the appearance of noise. If your enhancer includes “structure” or “clarity,” use a small amount; these controls increase local contrast and can make low-light photos look crisp, but they can also exaggerate artifacts. Another helpful trick is to slightly reduce saturation in very noisy images, because noise is often more visible in saturated colors. For portraits, avoid heavy skin smoothing; it can remove character and make faces look plastic. Instead, focus on balanced exposure and accurate white balance so skin tones look natural. If the image is beyond repair due to motion blur, enhancement can only do so much—some AI deblur tools can help, but the best outcome may be a smaller crop or converting to black-and-white to make remaining noise feel intentional. If you’re looking for photo enhancer free, this is your best choice.
Enhancing Portraits: Natural Skin Tones, Sharp Eyes, and Balanced Light
Portraits are a common reason people search for a photo enhancer free option, but they’re also the easiest to over-edit. The goal is usually to create a flattering image while keeping the person recognizable and natural. Start with exposure: faces should be bright enough to see features clearly, but not so bright that skin loses texture. If the background is bright and the face is dark, lift shadows and consider lowering highlights to bring the scene closer together. White balance matters even more in portraits because skin tone shifts are immediately noticeable. If the person looks too orange, cool the temperature slightly. If they look too green or magenta, adjust tint. Once the overall tone is correct, use a modest contrast increase to add depth, and consider a small vibrance boost if the photo looks dull.
Sharpness should prioritize the eyes. Some tools offer selective sharpening or portrait enhancement that targets facial features. If not, a moderate global sharpness can work, but be cautious around skin. Noise reduction in portraits should be subtle; too much can erase pores and fine details. If your enhancer includes a “clarity” slider, keep it low because clarity can emphasize wrinkles and texture in a way that looks harsh. For a cleaner look, slightly reduce clarity and increase sharpness very gently, which can keep edges defined without making skin gritty. If the background is distracting, some free tools include basic blur or background softening; when used lightly, it can draw attention to the face. The most professional-looking portraits come from accurate color, balanced light, and restrained detail enhancement rather than heavy filters. If you’re looking for photo enhancer free, this is your best choice.
Product Photos and E-Commerce Listings: Clarity, Color Accuracy, and Trust
A photo enhancer free workflow is especially useful for product photos because small improvements can directly influence clicks and conversions. Product images need to be clear, well-lit, and color-accurate. Start by correcting white balance so whites look neutral and the product color matches reality. This is critical for clothing, cosmetics, home décor, and any item where color is part of the buying decision. Next, improve exposure and contrast so the product stands out from the background without losing detail in highlights or shadows. For example, glossy products often have bright reflections; lowering highlights can keep those reflections from turning into pure white patches, while lifting shadows can reveal shape and texture.
Expert Insight
Start with the basics before boosting anything: crop to improve composition, straighten the horizon, and correct exposure and white balance first. Then apply small, incremental adjustments to contrast and saturation so colors stay natural and skin tones don’t shift. If you’re looking for photo enhancer free, this is your best choice.
Choose a free photo enhancer that offers non-destructive editing and export controls, then compare results at 100% zoom to catch halos and over-sharpening. For the cleanest output, reduce noise before sharpening, and export in PNG for graphics or high-quality JPEG (85–95%) for photos. If you’re looking for photo enhancer free, this is your best choice.
Sharpness is important in e-commerce because buyers zoom in to inspect details. Apply sharpening until edges look defined, but stop before you see halos around the product outline. Noise reduction can help if the photo was taken indoors, but too much denoising can smear textures like fabric weave, leather grain, or wood patterns—textures that buyers use to judge quality. If your free enhancer includes a “dehaze” control, it can improve contrast in slightly foggy or low-contrast images, but it can also darken shadows quickly, so use it sparingly. Consistency across a product set matters: use similar enhancement settings for all items so your storefront looks cohesive. A reliable free tool that supports batch editing can save hours while keeping your catalog visually trustworthy. If you’re looking for photo enhancer free, this is your best choice.
Restoring Old or Scanned Photos with Free Enhancement Tools
Old photos often benefit from a photo enhancer free approach, especially when the goal is to share family memories or preserve history digitally. Scans and older prints can look faded, yellowed, or low-contrast. Start by correcting overall tone: increase contrast gently to restore separation between highlights and shadows. Then adjust white balance to reduce color casts—many old photos skew warm or greenish depending on paper aging and scanning conditions. If the image is very faded, a small vibrance boost can bring back color without turning it neon. For black-and-white photos that have become gray and flat, a careful contrast increase can restore depth, but watch for crushed shadows that hide detail in dark clothing or hair.
| Option | Best for | Key free features | Limitations (free) |
|---|---|---|---|
| Online photo enhancer (browser-based) | Quick fixes without installing anything | One-click enhance, basic color/contrast, sharpness, denoise | Daily usage caps, lower export resolution, watermark on some tools |
| Free desktop editor | More control and offline editing | Levels/curves, selective adjustments, noise reduction, batch processing (varies) | Steeper learning curve, fewer AI tools, slower workflow for one-click results |
| Free mobile enhancer app | Enhancing photos on the go | Auto enhance, portrait touch-ups, HDR-like filters, quick exports | Ads, locked “pro” filters, export limits, occasional watermark |
Dust, scratches, and grain are common in scanned images. Some free enhancers include basic blemish removal or AI restoration, but even without advanced tools, noise reduction can reduce the appearance of fine grain. Be careful not to blur faces; older images already have limited resolution, so preserving edges matters. After denoising, apply mild sharpening to bring back perceived detail, but avoid heavy sharpening that creates jagged edges. Cropping and straightening also count as enhancement: aligning horizons and trimming damaged borders can make an old photo feel cleaner and more intentional. If the scan resolution is low, some AI upscaling features can help, but results vary—look for tools that allow you to compare before and after at 100% zoom so you can judge whether the enhancement is improving realism or inventing artifacts. If you’re looking for photo enhancer free, this is your best choice.
Mobile vs Desktop: Choosing the Right Free Photo Enhancer for Your Workflow
Choosing a photo enhancer free tool depends on where you do most of your work. Mobile enhancers are convenient because your photos are already on your phone. They’re ideal for quick edits before posting, sending, or uploading a listing. Mobile apps often have strong auto enhancement and portrait features because they’re designed for speed and simplicity. However, they can be limited in export control and file management. If you need consistent results across many images, desktop or web-based tools may offer better batch processing, more precise sliders, and easier side-by-side comparisons on a larger screen. Editing on a desktop also helps you spot issues like banding, halos, and noise that can be missed on a small display.
Web-based enhancers are a middle ground: they work on any device with a browser and often require no installation. The tradeoff is upload time and privacy considerations, since your image may be processed on a server. If privacy is important, look for tools that clearly state whether processing happens locally in the browser or remotely. Desktop software can be more private and sometimes more powerful, but truly free desktop options may have fewer AI features compared to cloud services. For many people, the best workflow is hybrid: quick enhancements on mobile for casual use, and a more controlled desktop or web tool for important images like product catalogs, resumes, portfolio shots, or prints. Regardless of platform, prioritize tools that let you export at the resolution you need, since some free options limit output size unless you upgrade. If you’re looking for photo enhancer free, this is your best choice.
Privacy, Watermarks, and File Quality: What “Free” Really Means
When selecting a photo enhancer free service, it’s important to understand the practical limits that can come with free access. Some tools are free with no strings, while others are “free to try” and restrict exports, add watermarks, or limit the number of enhancements per day. Watermarks can be a dealbreaker for professional use, especially for product photos, marketing assets, or portfolio images. Output resolution is another common restriction: a tool may preview a great result but only allow low-resolution downloads unless you pay. That can be fine for messaging apps, but it’s not suitable for printing or e-commerce platforms that require larger images. Compression quality also matters; aggressive compression can introduce blocky artifacts and smear fine detail, making the enhancement feel pointless.
Privacy deserves attention as well. If you upload personal photos—children, IDs, private events—you should know how the service handles data. Look for clear policies about storage duration, whether images are used to train models, and whether you can delete uploads. Some online tools process images temporarily and then remove them; others may keep them for a period of time. If you prefer not to upload sensitive images, consider offline tools or apps that state they process on-device. Also consider metadata: some enhancers strip EXIF data (camera info, location), which can be good for privacy but bad if you rely on metadata for organization. A thoughtful approach to “free” means weighing convenience against control, especially if the images are tied to your business or personal life. If you’re looking for photo enhancer free, this is your best choice.
Practical Step-by-Step Workflow for Better Results Every Time
A repeatable workflow helps a photo enhancer free tool deliver consistent, natural improvements. Start by choosing the best source image available. If you have multiple shots, pick the one with the least motion blur and the most accurate focus; enhancement can’t fully fix a photo that’s fundamentally out of focus. Next, apply auto enhancement as a baseline if the tool offers it, then evaluate the result at full size or at least 100% zoom. If highlights look blown, reduce them. If shadows look muddy, lift them slightly, but stop before noise becomes distracting. Then correct white balance so neutrals (white shirts, gray walls, product backgrounds) look neutral. After that, adjust contrast carefully—too much contrast can crush detail and make skin or products look harsh. A small clarity adjustment can add perceived sharpness, but keep it subtle.
Then handle noise and sharpness. If the image is noisy, apply light denoising first. Re-check details like hair, text, fabric, and edges; if they start to smear, reduce denoising. After noise is controlled, add sharpening gradually until the image looks crisp, then back off slightly. If your tool offers a dehaze control, use it only when the photo truly looks hazy or low-contrast; otherwise, it can make colors too intense and shadows too dark. Finally, export with the right settings: choose the highest quality your free tool allows, and save in a format appropriate for the destination. JPG works for most photos; PNG is better for graphics or images with text where you want crisp edges. If you’re uploading to a platform that recompresses images, consider exporting at a slightly higher resolution to preserve clarity after compression. If you’re looking for photo enhancer free, this is your best choice.
Common Mistakes That Make Enhanced Photos Look Fake
Even the best photo enhancer free tool can produce unrealistic results when settings are pushed too far. The most common mistake is over-sharpening, which creates halos along edges—especially around hair, building lines, and product outlines. These halos are easy to spot and make the photo look heavily edited. Another frequent issue is excessive noise reduction, which turns skin and textured surfaces into smooth plastic. This can be tempting when a photo is grainy, but removing all grain often removes detail too. A more believable approach is to reduce the most distracting noise while keeping some natural texture. Over-saturation is another giveaway: skies become unnaturally blue, grass becomes neon green, and skin tones shift toward orange or red. Vibrance is usually safer than saturation, and small adjustments often look more premium than dramatic changes.
Contrast and clarity can also be overused. High contrast can crush shadows so dark areas lose information, while bright areas clip to pure white. Too much clarity can make portraits look harsh and emphasize skin texture in an unflattering way. Another mistake is relying entirely on auto enhancement without checking the details. Auto can misjudge scenes with mixed lighting or unusual colors, leading to strange tints. Always compare before and after and zoom in to check fine details. Finally, exporting at low quality can ruin an otherwise good enhancement. If your tool defaults to heavy compression, look for a quality slider or choose a higher-resolution export. A realistic enhancement should feel like the photo was taken with better lighting and steadier hands—not like it was run through a heavy filter. If you’re looking for photo enhancer free, this is your best choice.
Final Thoughts on Choosing a Photo Enhancer Free Option That Delivers
The most useful photo enhancer free tool is the one that fits your real needs: fast auto improvements when you’re busy, manual controls when you care about accuracy, and export options that preserve quality. Look for balanced enhancement—better light, clearer detail, natural color—without pushing images into an artificial look. If you edit portraits, prioritize skin tone accuracy and gentle sharpening. If you enhance products, prioritize white balance, clarity, and consistency across a set. If you restore old photos, focus on contrast, color cast correction, and careful noise handling. Free tools can absolutely produce impressive results, especially when you use a repeatable workflow and avoid the common traps of over-editing.
With a careful approach, a photo enhancer free workflow becomes less about “fixing” photos and more about presenting them at their best—clear, believable, and ready for sharing, selling, or saving. The key is restraint: start small, compare before and after, zoom in to verify details, and export at the highest quality you can. When you choose tools that respect your time, privacy, and image quality, you’ll get enhancements that look professional without paying for complicated software or subscriptions.
Watch the demonstration video
In this video, you’ll learn how to use a free photo enhancer to quickly improve image quality without paid software. It covers simple steps to sharpen details, reduce noise, boost colors, and fix lighting for clearer, more professional-looking photos. You’ll also see tips for choosing the best free tools and avoiding over-editing. If you’re looking for photo enhancer free, this is your best choice.
Summary
In summary, “photo enhancer free” is a crucial topic that deserves thoughtful consideration. We hope this article has provided you with a comprehensive understanding to help you make better decisions.
Frequently Asked Questions
What is a free photo enhancer?
A **photo enhancer free** tool is an app or website that lets you improve your images without paying—boosting sharpness, fixing lighting, enhancing colors, and reducing noise in just a few clicks. Many offer solid basic features for free, with optional paid upgrades if you want more advanced editing options.
Are free photo enhancers safe to use?
They can be safe to use, but it’s worth taking a moment to read the provider’s privacy policy, confirm whether your images are stored or shared, and steer clear of any **photo enhancer free** tool that asks for unnecessary permissions or has vague, questionable data practices.
Will a free photo enhancer increase resolution and fix blur?
Plenty of tools promise upscaling and sharpening, but the results can vary widely—slightly blurry images often clean up nicely, while photos that are heavily blurred or missing fine detail may never fully bounce back, even with a **photo enhancer free** option.
Do free photo enhancers add watermarks?
Some tools do add watermarks—especially when you export in high resolution or use advanced AI features—while others offer watermark-free downloads with trade-offs like smaller file sizes, limited credits, or daily caps, making it easier to find a **photo enhancer free** option that fits your needs.
Can I enhance photos on my phone for free?
Absolutely—plenty of mobile apps offer one-tap improvements, filters, and simple editing tools, making it easy to upgrade your shots in seconds. If you’re looking for a **photo enhancer free** option, prioritize apps that let you export in full resolution and, if it matters to you, handle edits offline for better privacy and reliability.
What should I look for in the best free photo enhancer?
Standout features include one-click auto enhancement, smart noise reduction, precise sharpening, accurate color correction, high-quality upscaling, and efficient batch processing—plus transparent policies on image ownership, storage, and export limits, making it a reliable **photo enhancer free** option.
📢 Looking for more info about photo enhancer free? Follow Our Site for updates and tips!

Trusted External Sources
- Any free online image enhancer ? : r/AskPhotography – Reddit
Feb 6, 2026 … Fotor is a great free photo enhancer with no sign up and a free 4k download. Someonethebest. • 1d ago. free online upscalers are kinda trash. If you’re looking for photo enhancer free, this is your best choice.
- Free AI Image Enhancer | Adobe Express
Quickly enhance your photos on your mobile device using AI-powered or manual editing tools with the free Adobe Express app for iOS and Android. If you’re looking for a **photo enhancer free** option that’s simple to use, Adobe Express makes it easy to refine lighting, color, and clarity in just a few taps.
- Remini – AI Photo Enhancer – App Store – Apple
• Any unused portion of a free trial period, if offered, will be forfeited when purchasing a subscription. Have a feature request you would like to see in a … If you’re looking for photo enhancer free, this is your best choice.
- AI Photo Enhancer – Improve Image Quality and Resolution – Picsart
Picsart’s photo enhancer free tool sharpens your images, brings out extra detail, and makes every shot look polished and ready to share. Best of all, you can download and save lower-resolution versions at no cost.
- Upscale Image Online | AI Image Enhancer – Airbrush
Upgrade your pictures in seconds with our AI Image Enhancer—an easy, **photo enhancer free** tool that upscales images online for cleaner, sharper, more detailed results. It’s ideal for photographers, designers, and anyone who wants to quickly improve image quality for social media, print, or professional projects.