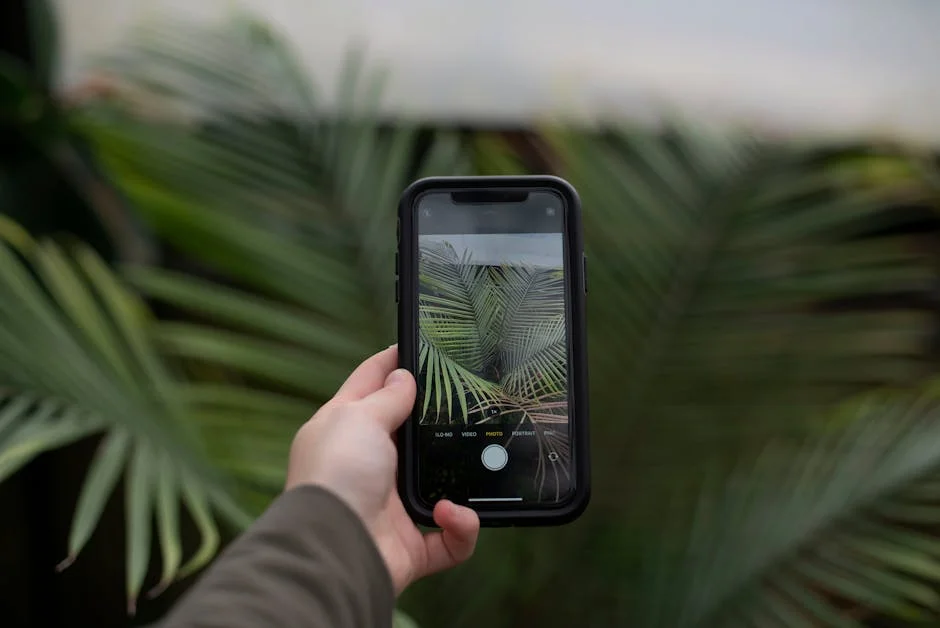
Getting a clean subject with a soft, creamy backdrop is one of the fastest ways to make a photo look intentional, and that’s exactly why so many people search for how to blur background iPhone images. A blurred backdrop reduces distractions, makes faces and products stand out, and gives everyday snapshots a more “portrait” feel. The effect is especially useful in busy environments—cafés, streets, bedrooms, classrooms—where clutter can pull attention away from the subject. Even when the lighting is good, a sharp background can compete with the person or object you’re trying to highlight. By separating the subject from the environment, the viewer’s eye goes where you want it to go. That separation is often described as “depth of field,” and it’s one of the most recognizable traits of professional-looking photography. On iPhone, you can create this look with built-in camera modes, editing tools, and third-party apps, depending on your model and how much control you want.
Table of Contents
- My Personal Experience
- Why People Want to Blur Background iPhone Photos
- How Background Blur Works on iPhone: Optical vs Computational
- Using Portrait Mode to Blur Background on iPhone (Step-by-Step)
- Adjusting Depth Control After the Shot for a Natural Look
- Blurring the Background While Taking Selfies (Front Camera Tips)
- Using Cinematic Mode and Video Portrait Effects for Background Blur
- Blurring Background in the Photos App Without Portrait Mode
- Expert Insight
- Best Third-Party Apps to Blur Background iPhone Images (What to Look For)
- Pro Shooting Techniques to Create Natural Background Blur (Even Before Editing)
- Common Problems When You Blur Background on iPhone (And How to Fix Them)
- Creative Ways to Use Background Blur for Portraits, Products, and Social Content
- Choosing the Right iPhone Settings and Models for Better Background Blur
- Final Thoughts on Getting the Best Blur Background iPhone Look
- Watch the demonstration video
- Frequently Asked Questions
- Trusted External Sources
My Personal Experience
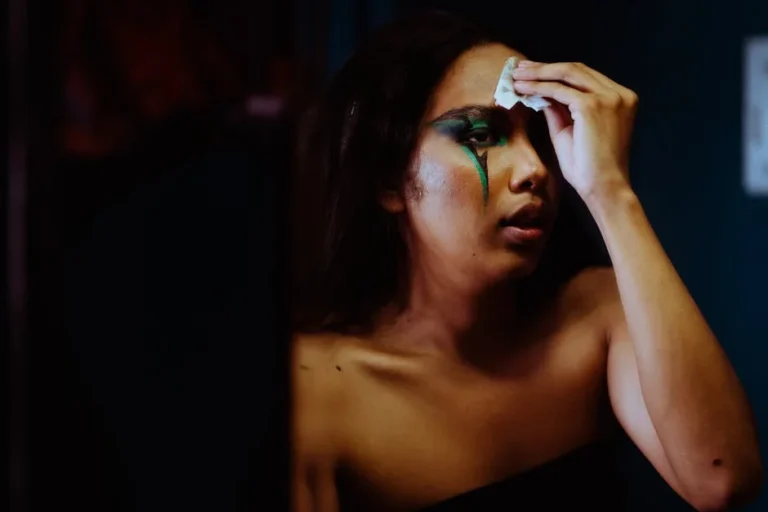
I used to get frustrated trying to take nice photos on my iPhone because my apartment is always a little cluttered, and the background would steal all the attention. A friend showed me how to blur the background by switching to Portrait mode, and it immediately made my pictures look cleaner—especially for quick shots of my coffee or my dog by the window. The first time I tried it, the edge detection was a bit weird around my dog’s fur, but tapping to focus and backing up a step helped a lot. Now I’ll usually take two versions—one in Portrait and one regular—just in case the blur looks too artificial. It’s such a small tweak, but it’s made me way more confident sharing photos without obsessing over what’s behind the subject. If you’re looking for blur background iphone, this is your best choice.
Why People Want to Blur Background iPhone Photos
Getting a clean subject with a soft, creamy backdrop is one of the fastest ways to make a photo look intentional, and that’s exactly why so many people search for how to blur background iPhone images. A blurred backdrop reduces distractions, makes faces and products stand out, and gives everyday snapshots a more “portrait” feel. The effect is especially useful in busy environments—cafés, streets, bedrooms, classrooms—where clutter can pull attention away from the subject. Even when the lighting is good, a sharp background can compete with the person or object you’re trying to highlight. By separating the subject from the environment, the viewer’s eye goes where you want it to go. That separation is often described as “depth of field,” and it’s one of the most recognizable traits of professional-looking photography. On iPhone, you can create this look with built-in camera modes, editing tools, and third-party apps, depending on your model and how much control you want.

Another reason blur is so popular is that it solves real-world problems that happen in casual shooting. Maybe the wall behind someone has a bright poster, or there’s a random stranger in the distance, or your kitchen counter is messy. If you blur background iPhone shots, you can keep the moment while minimizing what you’d rather not emphasize. Blur can also create a sense of depth and mood: city lights become soft bokeh, trees become painterly, and indoor scenes look more cinematic. For social media, a soft background can increase perceived quality without requiring a separate camera. For business use—like photographing a product, food item, or handmade craft—background blur can make the subject appear premium and reduce the need for complicated staging. The good news is that iPhone offers multiple ways to achieve background blur, from quick “capture it right” methods to precise post-editing that lets you dial in the strength and even refine the edges around hair, glasses, and complex shapes.
How Background Blur Works on iPhone: Optical vs Computational
To blur background iPhone photos effectively, it helps to understand how the effect is created. Traditional cameras use optics: a wide aperture lens and a larger sensor can render a shallow depth of field naturally, blurring what’s behind (and sometimes in front of) the focus point. iPhone cameras have small sensors and relatively small lenses, so purely optical blur is limited compared to larger cameras. However, Apple heavily relies on computational photography—software that analyzes the scene, identifies the subject, and then simulates a depth map to apply blur where it should appear. This is why iPhone Portrait mode can create background blur that looks like it came from a wider-aperture lens. The phone essentially “understands” the scene, separating subject from background, and applies a graduated blur that increases with distance. When it works well, it looks very natural. When it struggles—fine hair, transparent objects, or complex edges—you may see halos or inaccurate blur around the subject.
Computational blur isn’t a single effect; it’s a combination of segmentation, depth estimation, and a blur algorithm that tries to mimic how lenses render out-of-focus areas. iPhone Portrait mode also simulates different “apertures” (f-numbers) after the shot, which is unusual in classic photography because aperture is set at capture time. On iPhone, that f-number is more like a blur intensity slider that tries to approximate lens behavior. Some iPhone models can also use LiDAR (on certain Pro models) to improve subject separation in low light and with tricky edges. Still, you can blur background iPhone images without Portrait mode by using editing tools that apply selective blur, radial blur, or mask-based blur. Those methods rely less on depth maps and more on manual or AI-assisted selection. Knowing the difference matters because it determines when you should prioritize capturing in Portrait mode versus shooting normally and adding blur later for more control.
Using Portrait Mode to Blur Background on iPhone (Step-by-Step)
Portrait mode is the most straightforward way to blur background iPhone photos during capture. Start by opening the Camera app and swiping to “Portrait.” You’ll usually see prompts like “Move farther away” or “Move closer,” depending on the lens and your distance. These prompts matter because the depth estimation works best within a certain range. Place your subject in even lighting when possible—window light or shade tends to look flattering. Tap on the subject’s face or the key object to ensure focus. You’ll also see a label such as “Natural Light,” “Studio Light,” or other Portrait Lighting options. These are optional, but “Natural Light” is a safe default if you want realistic results. Once the iPhone detects a person or subject and confirms the depth effect (often indicated by the background preview blur), take the photo. Try a few variations: slightly different distances, different angles, and a cleaner background with some space behind the subject. The farther the background is from the subject, the more convincing the blur tends to look.
For stronger separation, avoid having the subject pressed against a wall. Give them a few feet of distance so the phone can blur the backdrop more naturally. If you’re photographing an object, keep the edges simple and well-lit; depth mapping struggles with reflective or transparent items. After shooting, open the photo in the Photos app and tap “Edit.” If the image was taken in Portrait mode, you’ll see a depth control slider (often represented by an “f” icon). Slide it to adjust how much you blur background iPhone Portrait shots. A lower f-number generally means stronger blur, while a higher f-number reduces it. You can also adjust exposure, highlights, and shadows to make the subject pop even more. If you notice strange cutouts around hair or shoulders, reduce the blur slightly; overly aggressive blur can make artifacts more visible. Saving a balanced blur that looks plausible is usually better than pushing the effect to the maximum.
Adjusting Depth Control After the Shot for a Natural Look
One of the biggest advantages of Portrait mode is the ability to refine the blur after capture. To blur background iPhone images in a way that still looks believable, treat the depth slider like a realism control rather than a “more is better” setting. Open the Portrait photo in Photos, tap “Edit,” and locate the depth control. If you slide toward a very strong blur, you may see the subject edge look too crisp compared to the background, or you might notice a subtle halo. A moderate blur often feels more like a real camera lens because the background becomes softer without turning into a uniform smear. Pay attention to transitions: in natural optics, blur increases gradually with distance. If your image has objects at different depths behind the subject (like a chair close by and a wall farther away), extreme blur can make everything look equally out of focus, which can feel artificial. Keeping the blur moderate helps preserve depth cues.
Also consider the type of scene. For a head-and-shoulders portrait, a stronger blur can work because the background is typically farther away and less detailed. For group photos, strong blur can cause some faces to fall out of the depth map and look oddly softened. In that case, reduce the blur background iPhone intensity so multiple people remain acceptably sharp. If you’re shooting objects like food, jewelry, or a small product, depth errors are more likely around fine edges. Here, a restrained blur plus a slight contrast boost on the subject can be more effective than heavy blur alone. Use other edits to support subject separation: increase brightness on the subject, lower highlights in the background, or add a subtle vignette. These changes can make the subject stand out without forcing the blur to carry the entire “professional look.” The goal is a cohesive image where the blur supports the story rather than becoming the story.
Blurring the Background While Taking Selfies (Front Camera Tips)
Many people want to blur background iPhone selfies, but the front camera can behave differently depending on your model. If your iPhone supports Portrait mode on the front camera, the process is similar: switch to Portrait, choose a lighting effect (or keep it natural), and ensure the phone detects your face. Good lighting is crucial for the selfie camera because it often has a smaller sensor and can introduce noise in low light. Face a window or a soft light source, and avoid harsh overhead lighting that creates shadows under the eyes. Keep some distance between you and the background; if you’re right up against a wall, the phone has less depth separation to work with. If you’re holding the phone, stabilize your hands or use a small tripod to reduce motion blur, because motion blur combined with simulated blur can look messy at the edges.
After capture, refine the depth in Photos the same way. For selfies, hair edges and glasses frames are common problem areas. If you see artifacts, reducing blur background iPhone intensity often fixes the issue better than trying to over-edit. Another helpful tactic is to simplify the background: choose a plain wall or an outdoor scene with distant trees or buildings. Distant backgrounds produce more pleasing blur because the simulated depth map is clearer. If your device doesn’t support Portrait mode on the front camera, you can still create background blur by shooting normally and applying a selective blur in editing apps. In those cases, prioritize a sharp subject by tapping to focus on your face and ensuring adequate light. A crisp subject makes the later blur effect more convincing because the eye accepts the separation more readily when the subject detail is strong.
Using Cinematic Mode and Video Portrait Effects for Background Blur
Background blur isn’t just for still photos. If you want to blur background iPhone video, Cinematic mode (on supported models) provides a built-in way to create depth-based blur while recording. Open the Camera app, select “Cinematic,” and frame your subject. The iPhone will attempt to identify faces or prominent subjects and keep them in focus while blurring the background. You can tap to change focus from one subject to another, creating a “rack focus” effect that’s common in filmmaking. This is especially useful for short clips where you want a professional look without manual focus gear. For best results, keep the subject well-lit and avoid extremely fast movement. If the subject moves rapidly across the frame, the depth estimation may struggle and you might see the focus shift unexpectedly.
After recording, you can edit Cinematic video in Photos and adjust the depth effect, similar to Portrait photos. This is a powerful way to fine-tune how much you blur background iPhone footage after the fact. If the blur looks too strong or creates edge artifacts, reduce the depth effect. If the focus changes at the wrong time, you can often tap to set focus points in the timeline. Keep in mind that heavy blur in video can reveal segmentation issues more easily than in photos because the edges move from frame to frame. A slightly lighter blur often looks more stable and realistic. Also, consider your background: point light sources, like string lights or street lamps, can create attractive bokeh, but busy patterns can make the simulated blur look jittery. Choosing a background with depth and distance is still the easiest path to a convincing cinematic look.
Blurring Background in the Photos App Without Portrait Mode
Not every iPhone photo is taken in Portrait mode, and sometimes you only realize later that you want a softer background. While the built-in Photos app is strongest with Portrait images, you can still blur background iPhone pictures indirectly with a combination of tools and smart editing choices. If you don’t have a depth slider available, consider using a subtle vignette and selective exposure adjustments to mimic separation. Darkening the edges and lowering background contrast can create the impression of a softer backdrop, even if it isn’t truly blurred. You can also reduce clarity-like effects by lowering sharpness (if available through certain editing styles) or using “Noise Reduction” to smooth background texture. While these are not the same as true lens blur, they can reduce distraction and bring attention to the subject in a natural way.
Expert Insight
Use Portrait mode for the quickest background blur: open the Camera app, swipe to Portrait, tap your subject to lock focus, and move closer until the depth effect activates. After shooting, open the photo in Photos > Edit and adjust the f-number (Depth Control) to fine-tune how soft the background looks. If you’re looking for blur background iphone, this is your best choice.
For photos that weren’t taken in Portrait mode, create a blur with editing: in Photos > Edit, apply a subtle Vignette and slightly lower Sharpness to push attention toward the subject. If you need stronger separation, use a third-party editor with a Lens Blur tool and mask the subject carefully for a natural edge. If you’re looking for blur background iphone, this is your best choice.
Another approach is duplicating the photo in a third-party editor that supports blur masks, then saving it back to Photos. If you prefer staying close to Apple’s ecosystem, you can use Apple’s editing workflow with extensions from reputable apps installed on the iPhone. The key is to avoid overdoing it: when you blur background iPhone shots artificially, the most common giveaway is a hard edge around the subject or blur bleeding into the subject. If you can’t apply a perfect mask, lean toward subtlety and combine multiple small adjustments: slightly lower background saturation, slightly lower background exposure, add a mild vignette, and crop tighter to reduce background area. These steps can often achieve the same goal—subject emphasis—without relying on heavy blur. When you do need actual blur, a dedicated app with edge detection and feathering controls will deliver more consistent results than trying to force the Photos app to do something it wasn’t designed to do for non-Portrait captures.
Best Third-Party Apps to Blur Background iPhone Images (What to Look For)
When you want more control than the built-in camera and Photos tools provide, third-party editors can help blur background iPhone images with precision. The most important features to look for are subject selection quality, edge refinement, feathering, and adjustable blur types. Some apps offer AI-based “subject cutout” that automatically detects people, pets, and objects, then applies background blur with a slider. Others provide manual brushes so you can paint the blur exactly where you want it. For portraits, hair-aware masking is a big advantage; for products, you want crisp edges with a gentle feather so the subject doesn’t look pasted on. Also consider whether the app supports different blur styles—lens blur, Gaussian blur, motion blur, radial blur—because “lens blur” typically looks more photographic, while Gaussian blur can look flat if pushed too far.
| Method | Best for | How to do it (iPhone) |
|---|---|---|
| Portrait Mode (Camera) | Natural background blur in photos with people/subjects | Open Camera → select Portrait → frame subject → shoot → optionally adjust blur in Photos (Edit → Depth control). |
| Photo Edit (Depth / Blur) | Changing blur amount after taking a Portrait photo | Open Photos → select a Portrait photo → Edit → use f/Depth slider to increase/decrease background blur → Done. |
| Blur Background in Video (Cinematic/Apps) | Background blur while recording video | Use Cinematic mode (if available): Camera → Cinematic → record → adjust focus/blur in Photos; otherwise use a third‑party app with background blur. |
Workflow matters too. A good app should let you zoom in, refine edges, and toggle a mask overlay to see what will be blurred. If you regularly blur background iPhone photos for social media, batch processing and presets can save time, but be careful with one-size-fits-all settings. Lighting, background distance, and subject complexity vary from photo to photo. Also evaluate export quality: some apps reduce resolution or add compression unless you pay. For professional or print use, choose an editor that exports at full resolution with minimal artifacts. Finally, pay attention to privacy: since photos can be sensitive, prefer apps that process edits on-device rather than requiring uploads to cloud servers, unless you’re comfortable with the app’s policy. The best results usually come from a blend of solid AI selection plus manual refinement tools, allowing you to fix the small details that separate “pretty good” from “convincing.”
Pro Shooting Techniques to Create Natural Background Blur (Even Before Editing)
Even with computational tools, the easiest way to blur background iPhone photos convincingly is to set up the scene so the phone can succeed. The single most effective technique is increasing the distance between the subject and the background. Put your subject a few feet in front of a wall instead of right against it, or shoot outdoors with a distant background. The more depth the scene has, the more the iPhone can create a believable separation. Next, choose the right lens if your iPhone offers multiple. Some models allow Portrait mode with different focal lengths; longer focal lengths often produce a more flattering perspective and can enhance the blur look. Also, get physically closer to your subject (without losing focus). A closer subject fills more of the frame, reduces background detail, and makes blur more noticeable. Tap to focus on the subject and lock exposure/focus if needed by holding the focus point, especially in tricky lighting.
Lighting and background texture matter as much as camera settings. For a pleasing blur background iPhone look, avoid backgrounds with high-contrast patterns right behind the subject, like striped curtains or chain-link fences, because edge detection can struggle and the blur can look harsh. Instead, look for backgrounds with smoother tones or distant lights that can turn into soft bokeh. If you’re indoors, position the subject near a window and keep the background darker; the contrast helps the subject stand out even if the blur is mild. If you’re photographing products, use a simple setup: place the item near the camera, keep the background farther away, and use side lighting to define shape. These capture-time choices reduce the need for aggressive editing, which is where artifacts often appear. A photo that starts with clean separation will tolerate stronger blur without looking fake, and it will still look good if you keep the blur subtle.
Common Problems When You Blur Background on iPhone (And How to Fix Them)
When you blur background iPhone images, the most common issue is edge artifacts—halos around hair, ears, shoulders, or glasses. This happens when the depth map or mask isn’t perfectly aligned with the subject. The best fix is often to reduce blur intensity slightly, because artifacts become less noticeable when the background isn’t extremely soft. Another solution is improving lighting and contrast at capture time: a well-lit subject against a slightly darker background is easier for the phone to separate. If you’re editing in an app that supports refinement, use edge feathering to create a smoother transition. For hair, some apps offer “refine hair” or “smart refine” tools; if not, manually erase blur that leaks into hair strands and then apply a very light blur to the immediate edge to blend it naturally.
Another problem is incorrect focus or depth assignment, where parts of the subject become blurred while some background stays sharp. In Portrait mode, this can happen if the subject moves, if there are multiple faces at different distances, or if the phone locks onto the wrong element. The fix starts with capture: keep the camera steady, ensure the subject is within the recommended distance, and tap to focus on the correct face or object. In post, if the photo is a Portrait shot, you can sometimes adjust the focus point by tapping in edit mode on supported devices, then tweak the blur background iPhone depth. For videos in Cinematic mode, you can correct focus points in the timeline. If the background blur looks “cut out,” add supporting edits: a slight vignette, gentle background exposure reduction, and a small boost in subject brightness. These subtle adjustments help the eye accept the separation and make the blur feel like part of the scene rather than a filter layered on top.
Creative Ways to Use Background Blur for Portraits, Products, and Social Content
Once you’re comfortable with how to blur background iPhone images, you can use the effect strategically instead of applying it by default. For portraits, blur can emphasize expression and create a premium look, especially when paired with soft natural light. Try positioning your subject near a window, turning them slightly toward the light, and keeping the background several feet behind. The blur will soften the environment and make skin tones feel more luminous. For lifestyle portraits, leave just enough background detail to tell the story—like a café ambiance—while still keeping the person as the clear focal point. That means using moderate blur rather than maximum blur. For group portraits, keep blur lighter to avoid softening faces that fall slightly behind the focus plane. A balanced approach keeps everyone looking sharp while still reducing background clutter.
For product photography, background blur can make small items look more expensive and reduce the need for large seamless backdrops. Place the product close to the camera, keep the background far away, and use a clean surface. If you blur background iPhone product shots too much, the item can look pasted onto a blur field; instead, aim for a gentle falloff where the surface behind the product gradually softens. For food, blur can isolate the main dish while letting supporting elements—like a drink or utensils—fade softly. For social content, especially short-form video, blur can create a cinematic feel that elevates everyday scenes: talking-head videos, behind-the-scenes clips, or quick product demos. Combine blur with consistent color grading so the feed looks cohesive. The most effective creative use of blur is intentional: decide what the viewer should notice first, then use blur as one of several tools—along with light, composition, and color—to guide attention.
Choosing the Right iPhone Settings and Models for Better Background Blur
Not all iPhones produce the same background blur results, because hardware and software features vary by generation. Newer models typically offer improved Portrait mode processing, better subject detection, and more flexible focal length options. If you frequently blur background iPhone photos for business or content creation, it’s worth learning which lenses your device supports in Portrait mode and what distance ranges work best. Some iPhones perform better with people than with objects, since face detection is highly optimized. If you shoot a lot of non-human subjects—products, pets, food—test Portrait mode in your typical lighting and see how consistently it isolates edges. Also note that low light can reduce accuracy, causing noisy backgrounds and messy edges. In those situations, add light rather than relying on heavy blur. Even a small lamp, a window, or an inexpensive LED panel can dramatically improve segmentation quality.
Settings also matter. Keep your lens clean; smudges reduce contrast and can make the subject look less crisp, which undermines the blur illusion. If available, use higher-quality capture settings and avoid excessive digital zoom, which can soften details. When you blur background iPhone images, a sharp subject is half the battle. Consider using burst or taking multiple frames to ensure you get at least one shot with clean edges and a natural expression. If you plan to edit heavily, shoot with enough light to minimize noise, because noise in the background can interact with blur in a way that looks unnatural. Finally, choose backgrounds that complement the subject. The iPhone can simulate blur, but it can’t always fix a chaotic scene. A cleaner backdrop, more distance, and better light will often outperform any app-based blur slider, even if you’re using the latest model.
Final Thoughts on Getting the Best Blur Background iPhone Look
The most reliable way to blur background iPhone photos is a combination of smart capture technique and restrained editing. Start with depth: keep your subject separated from the background, use good light, and frame with intention. Then choose the right tool for the job—Portrait mode for fast, natural-looking results, Cinematic mode for video depth, or a dedicated editor when you need precise masking and edge control. Keep an eye on realism by avoiding extreme blur settings that create halos or cutout edges, and use supporting edits like subtle vignettes and background exposure adjustments to guide attention without forcing the effect. With a few minutes of practice, the blurred background look becomes repeatable, consistent, and adaptable to portraits, products, and everyday moments, making blur background iPhone results feel polished rather than accidental.
Watch the demonstration video
Learn how to blur the background on your iPhone to create a clean, professional look in photos and videos. This video walks you through using Portrait mode, adjusting depth control, and trying simple editing tools to enhance background blur. You’ll also get quick tips for better lighting, subject distance, and sharper focus for standout results. If you’re looking for blur background iphone, this is your best choice.
Summary
In summary, “blur background iphone” is a crucial topic that deserves thoughtful consideration. We hope this article has provided you with a comprehensive understanding to help you make better decisions.
Frequently Asked Questions
How do I blur the background on an iPhone photo?
To get a professional-looking depth effect, open the Camera app and switch to Portrait mode, tap to keep your subject sharp and in focus, then snap the photo—your **blur background iphone** effect will be applied automatically.
Which iPhones support background blur (Portrait mode)?
Most iPhones with Portrait mode support background blur, including many models from iPhone 7 Plus/8 Plus and iPhone X and later; availability can vary by camera type and iOS version. If you’re looking for blur background iphone, this is your best choice.
Can I blur the background after taking a photo on iPhone?
Yes. Open the photo in Photos, tap Edit, and adjust the Depth control (for Portrait photos) to increase or reduce background blur.
How do I blur the background in a selfie on iPhone?
To get a great selfie, open the Camera app, switch to the front-facing camera, and select Portrait mode. Center your face in the frame, then wait until the lighting indicator shows it’s ready—tap the shutter to capture your shot and **blur background iphone** for a polished, professional look.
Why isn’t Portrait mode background blur working on my iPhone?
Common causes include shooting in low light, standing too close to (or too far from) your subject, having a cluttered edge in the frame, picking the wrong lens, or using an iPhone model/setting that doesn’t support Portrait mode for that camera—any of which can make it harder to **blur background iphone** the way you expect.
How do I blur the background in iPhone videos?
Use Cinematic mode (on supported models) to add depth-of-field blur and adjust focus/blur in Photos after recording.
📢 Looking for more info about blur background iphone? Follow Our Site for updates and tips!

Trusted External Sources
- Free Blur Background Tool – Blur Photo Background Online – Canva
Can you blur photo backgrounds on iPhone? Yes, definitely. Download our free mobile app, so you have access to our auto background blur tool. Just upload an …
- Blur Photo Effect Background – App Store – Apple
Turn your iPhone or iPad into a quick, creative editing tool with just a tap. Easily hide distracting details, enhance your favorite shots, or design stunning wallpapers—and if you’re looking to **blur background iphone** style, this app makes it fast and effortless. Discover one of the best blur apps on the store.
- Why are my wallpapers being blurred out at the top with ios17? I can …
Sep 21, 2026 … If you’re trying to **blur background iphone** wallpaper effects and you can’t stand the look of it (same here), a simple workaround is to zoom in on the wallpaper until the blur disappears.
- iOS 17 wallpapers blurry at top – Apple Support Communities
Sep 23, 2026 … The blur on top is intentional so the photo does not interfere with the data and controls at the top of the poster screen. However, do let Apple … If you’re looking for blur background iphone, this is your best choice.
- How to manually blur backgrounds w/ iphone? : r/AskPhotography
On Jul 7, 2026, I noticed something odd with my photos: sometimes my iPhone locks onto the subject and gives that nice depth-of-field look where the background is blurred (like in the first picture), but other times everything stays sharp and the effect disappears (like in the second). Why does this happen, and how can I consistently **blur background iphone** in my shots?